Removing DataForge Services from Customer Infrastructure
Below are the steps needed to remove DataForge services from a customer environment. Make sure that the customer absolutelyno longer needs DataForge or any of the services in the Resource Group before running. There are times when customers use Databricks for more than DataForge so they wouldn't want to run this tear-down.
Azure:
Note: Run these steps for each environment you have set up within DataForge. For example, if you have a Dev and a Prod environment, you will need to complete this for each.
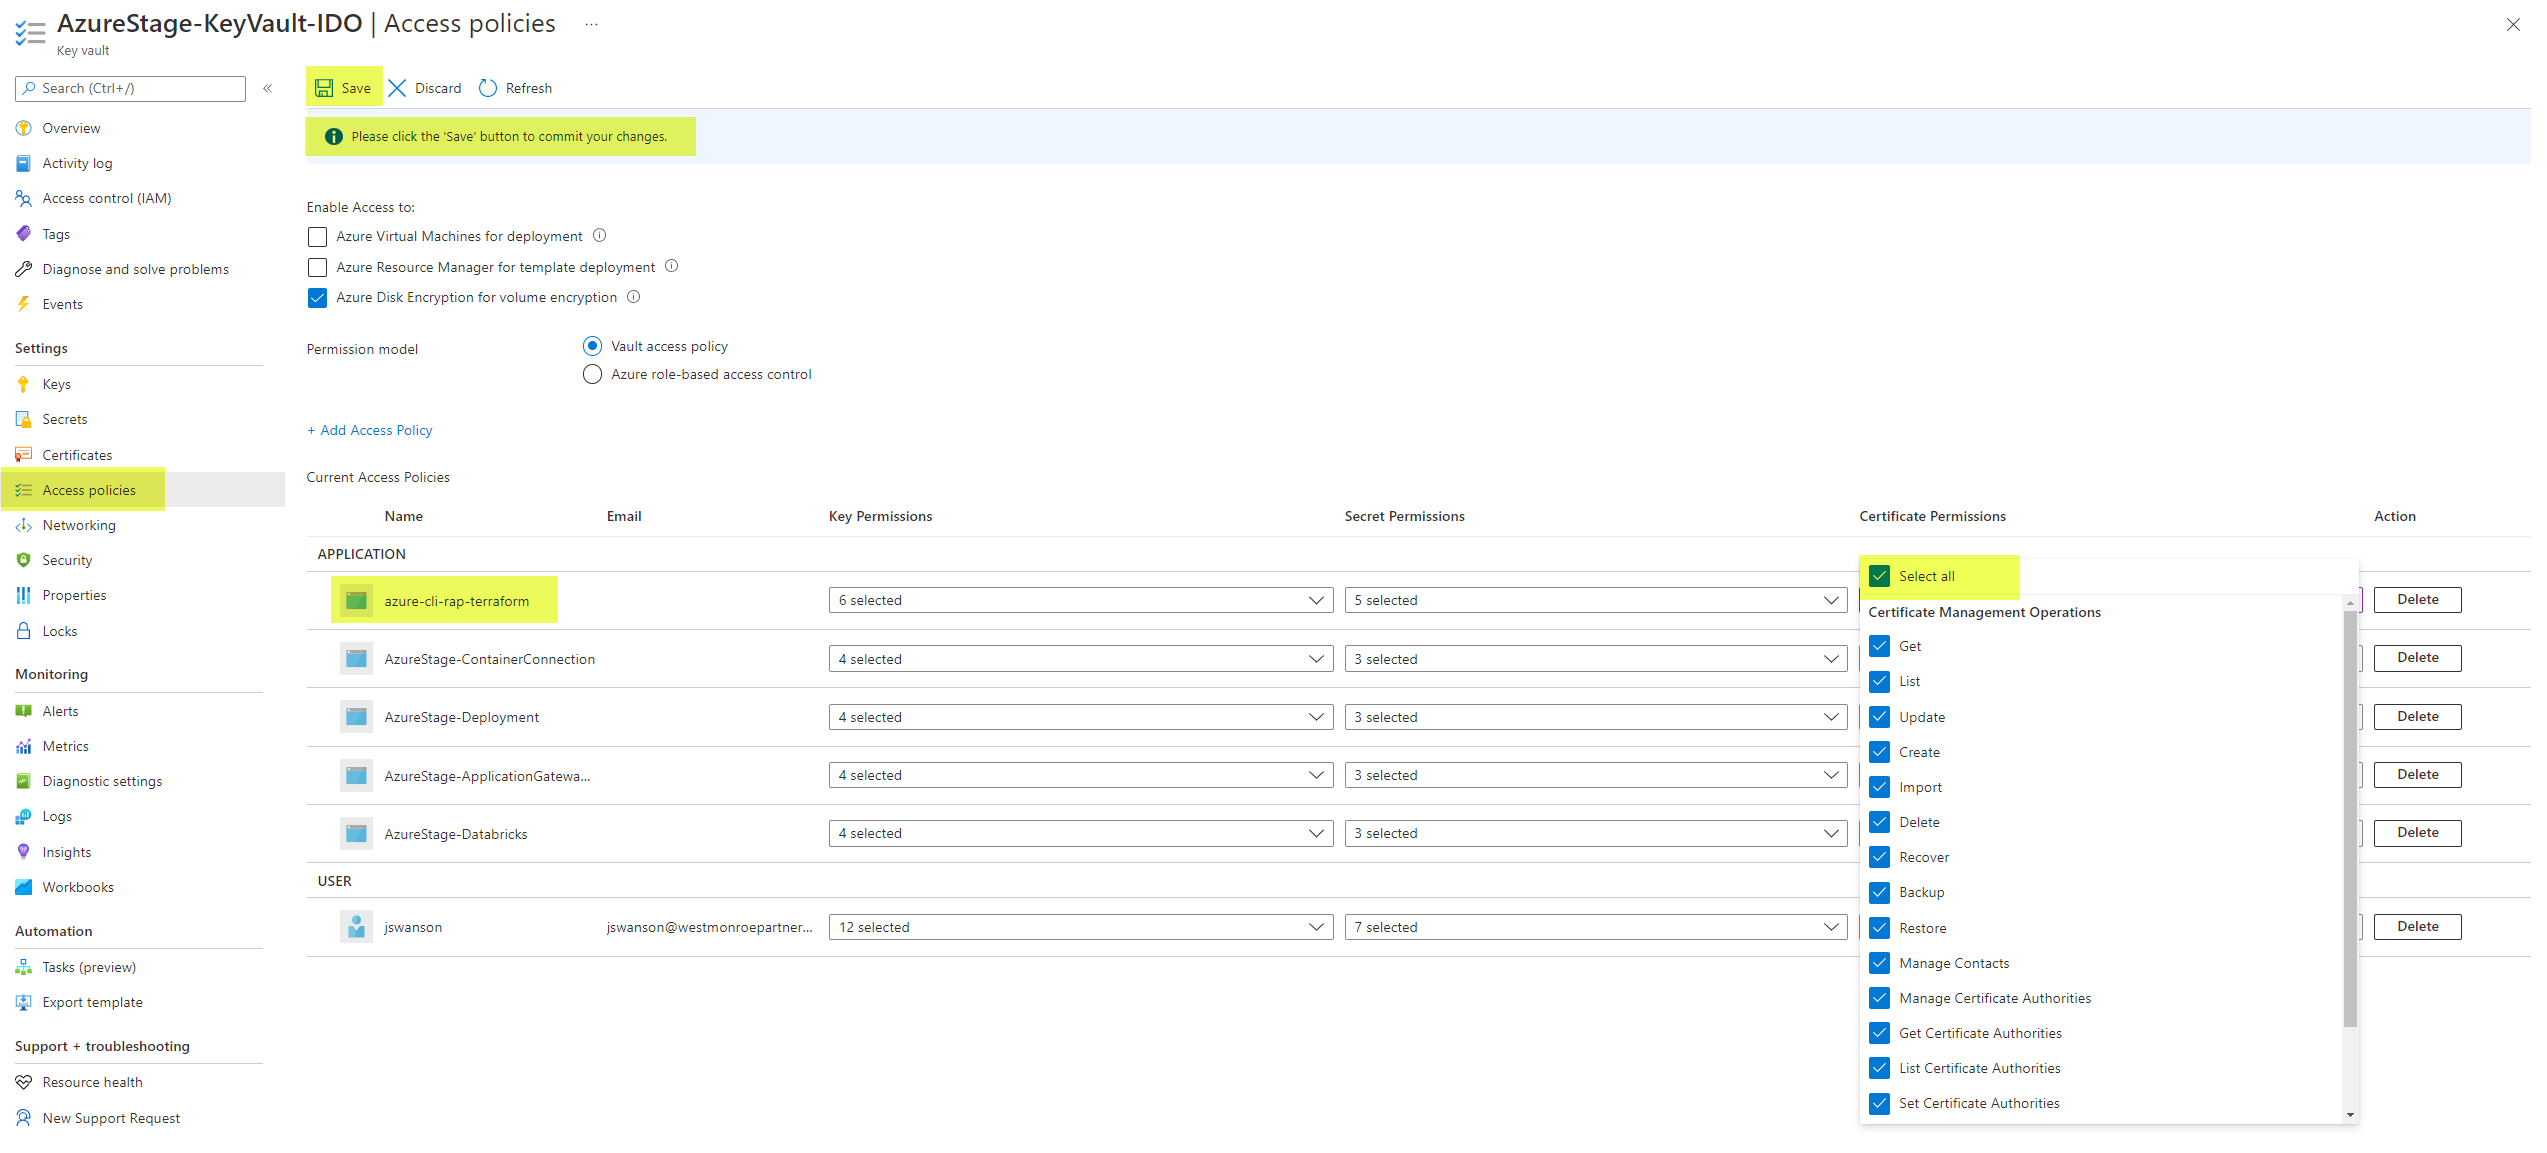
- Navigate to resource group in Azure and go to KeyVault resource (ex: Dev-KeyVault-DataForge)
- On the left-hand blade, click “Access policies” and then make sure that the admin application has all the certificate permissions selected. If it doesn’t, then hit “Select all” and then “Save”, as shown in the picture below.
- Navigate to Terraform and go to the workspace that’s being destroyed. Go to “Settings” and click “Destruction and Deletion”.\

- Click the “Queue destroy plan” button and enter the workspace name exactly, then queue the destroy plan.
- A plan will queue up in Terraform. Make sure that it plans successfully and then click apply when you’re ready to destroy the resource group and all resources within.
- If there are errors with resources being destroyed, try to troubleshoot to the best of your ability (it’s usually permissions issues, like in the KeyVault). If you can’t figure it out, just delete them manually from the Azure Portal.
AWS:
Note: Run these steps for each environment you have set up within DataForge. For example, if you have a Dev and a Prod environment, you will need to complete this for each.
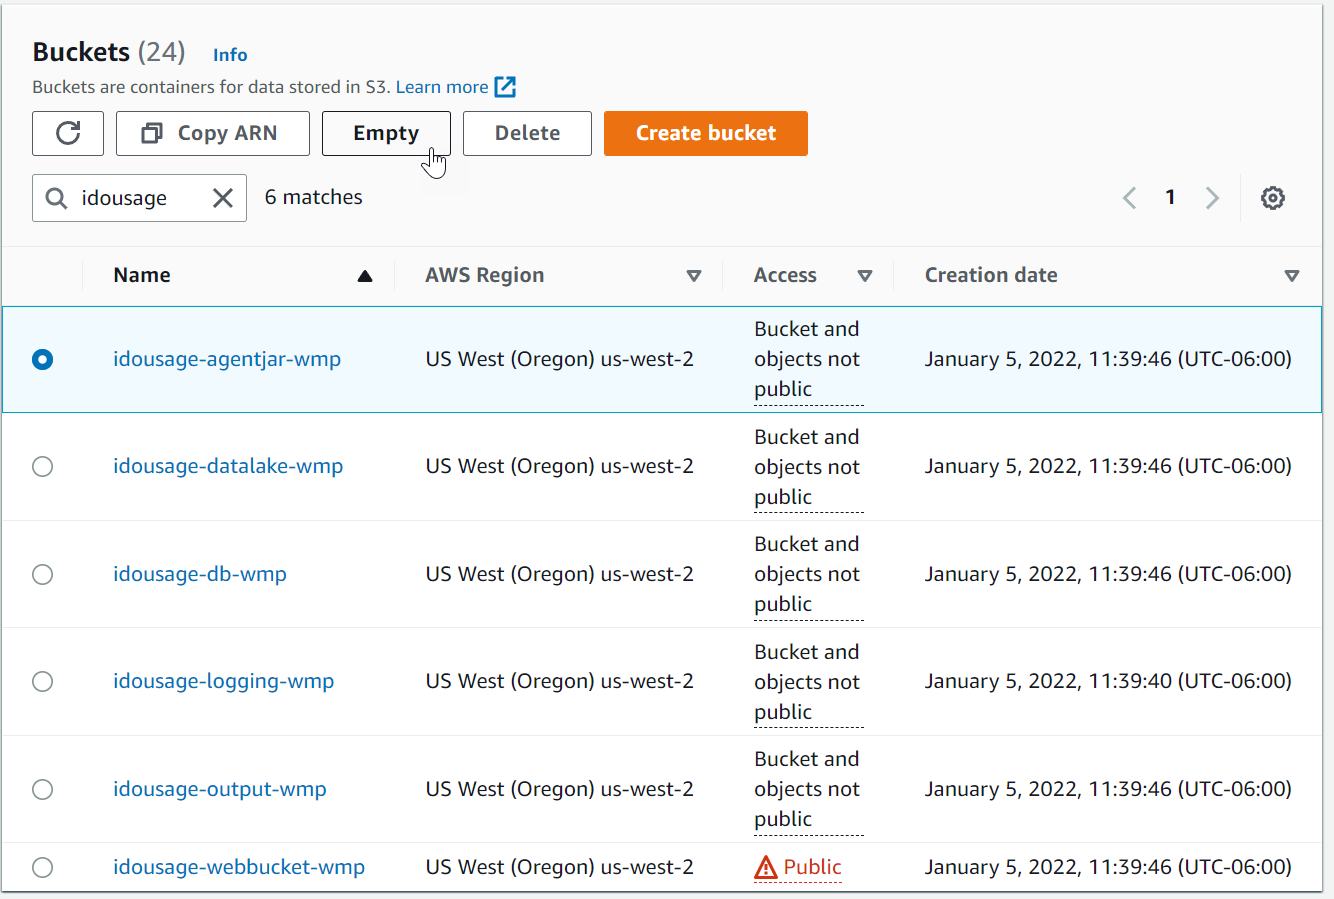
- Empty and Delete all DataForge buckets in AWS S3
- This can also be done after Step 2-4 instead. If done after, Terraform will error out and provide the names of the buckets needed to be emptied and deleted.
- Buckets in your AWS environment will be named slightly different than the screenshot below in the format of
- - 
- Navigate to Terraform and go to the workspace that’s being destroyed. Go to “Settings” and click “Destruction and Deletion”.
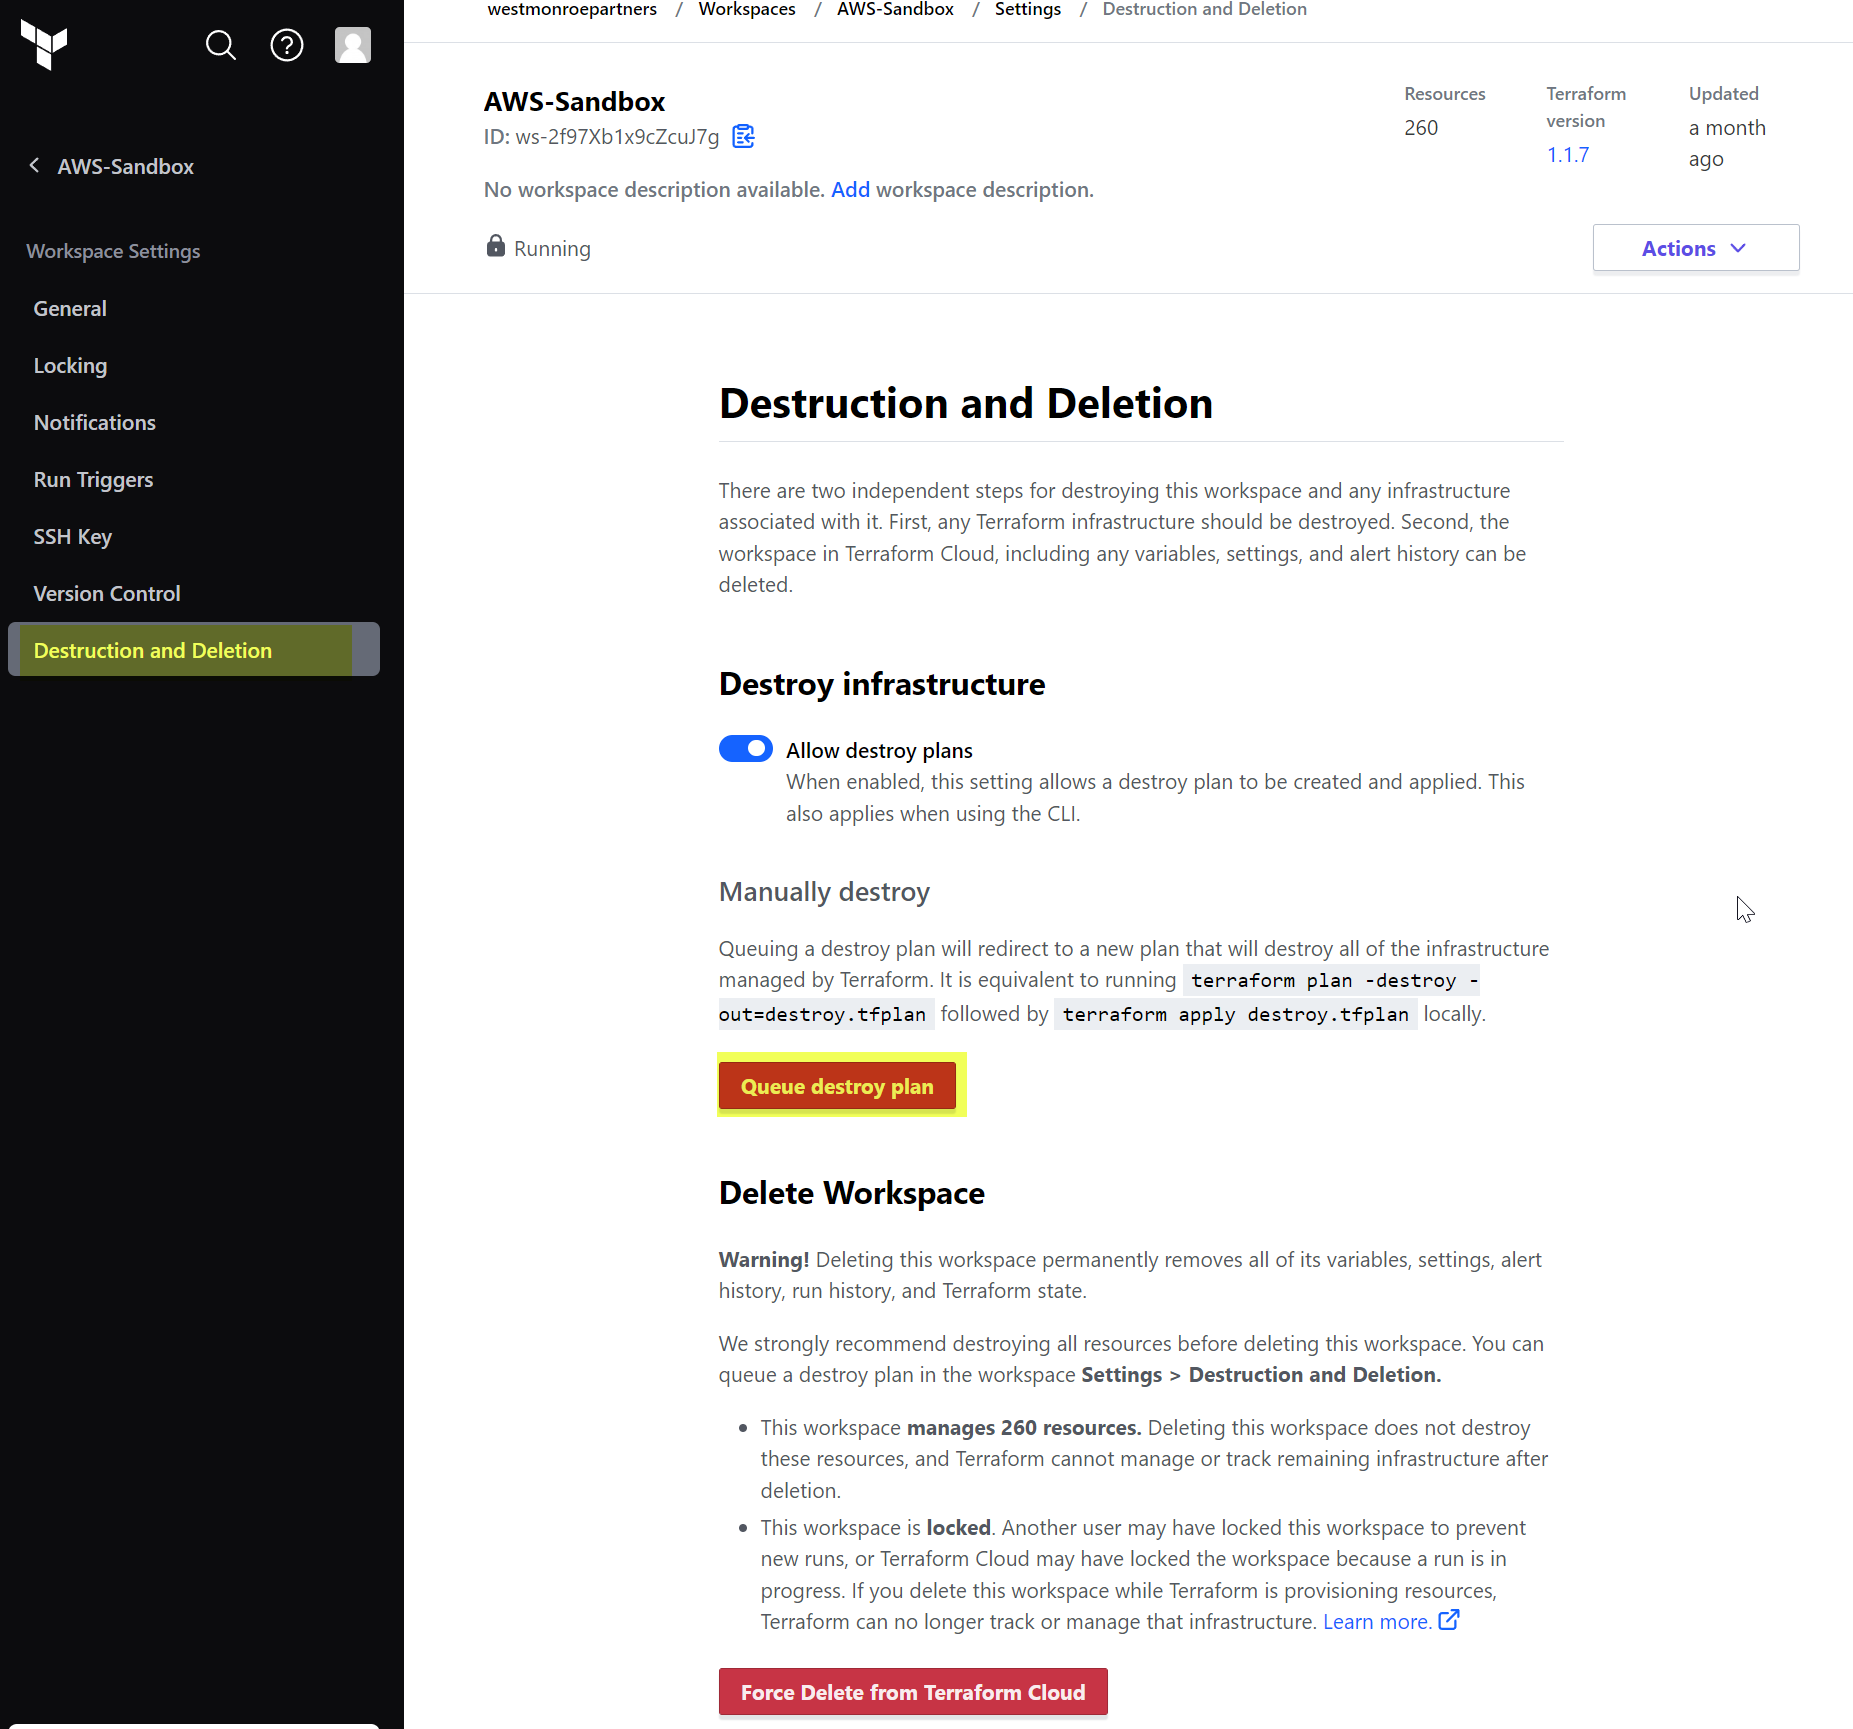
- Click the “Queue destroy plan” button and enter the workspace name exactly, then queue the destroy plan.
- A plan will queue up in Terraform. Make sure that it plans successfully and then click apply when you’re ready to destroy the resource group and all resources within.