Installing a New Agent
DataForge Agents transport data from on-premise sources to a cloud storage location (AWS or Azure) that DataForge manages. Agents are managed through the DataForge UI after installation. The Agent can only be installed on Windows.
Prerequisites
- OS: Windows 7 / Server 2008 R2 or later.
- Java: Amazon Corretto JDK 21 (preferred) or Oracle JDK 21. Download from the Corretto downloads page if not already installed. This applies to both AWS and Azure environments.
- Outbound network access: The Agent initiates all its own connections. Allow the following outbound HTTPS (port 443) destinations through any firewall. If SSL inspection is enabled, the certificate presented to the Agent machine must be trusted.
- AWS S3 / Azure Data Lake Storage
- DataForge API endpoint
- Auth0
- Source connectivity: All data sources the Agent will access must be reachable from the Agent machine. Avoid routing this traffic over low-capacity network segments, as the Agent pulls data and uploads it to cloud storage.
- SQL authentication: Source database users must use native database engine authentication. SQL Server Windows / Azure AD authentication is not supported for Agent users; use SQL Server authentication. Mixed-mode authentication can still be enabled for other workloads.
- Windows service account: Create a dedicated Windows user with access to any source data folders and permission to run services. Run
whoamiin a terminal to confirm the fully-qualified username. Running as LOCALSYSTEM is possible but not recommended. - Auth Protocol 2.0: Requires IAM access in AWS, or access to the Azure Storage Account hosting the datalake.
Machine Guid Command
Your machine Guid will be needed to complete the installation. To get the Machine Guid, run the following command in the terminal on the server that the Agent will be installed on.
Setting up a New Agent Configuration
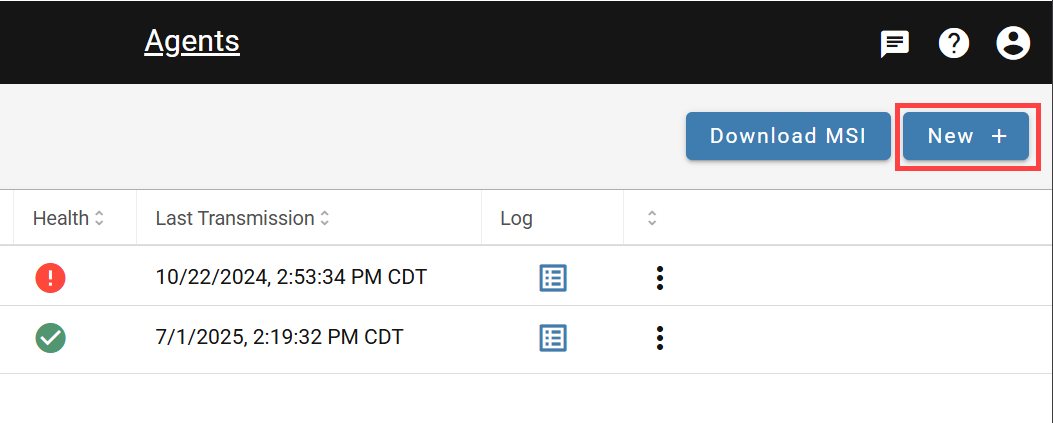
In the DataForge UI, navigate to Agents in the left menu and click New. Fill in the required fields listed below. You will need information about the host machine. For 2.0 protocol-specific fields (IAM, Azure Storage), see the relevant section below.
| Agent Inputs | Detail |
|---|---|
| Name | Agent name on the backend, and name reference for sources and other DataForge elements within the UI. |
| Description | Necessary clarification and detail. |
| Code | Agent code on the backend - this ideally should be the same as Name |
| Machine Guid | A specific key to identify the machine the agent is running on, see below for the terminal command to obtain. |
| Authentication Protocol | 1.0 protocol uses Auth0 for agent authentication and will be deprecated in a future release. 2.0 uses DataForge managed authentication and is recommended for all new agent installs. 1.0 is not selectable in SaaS environments. |
| IAM Access Key (AWS cloud only) | Authentication protocol 2.0 parameter - the IAM access key for the user that has access to write files to the datalake bucket |
| IAM Secret Key (AWS cloud only) | Authentication protocol 2.0 parameter - the IAM secret key for the user that has access to write files to the datalake bucket |
| Storage Account Name (Azure cloud only) | Name of storage account that hosts datalake container |
| Storage Account Key (Azure cloud only) | Access key for storage account that hosts datalake container |
| Datalake Container Name (Azure cloud only) | Name of datalake container |
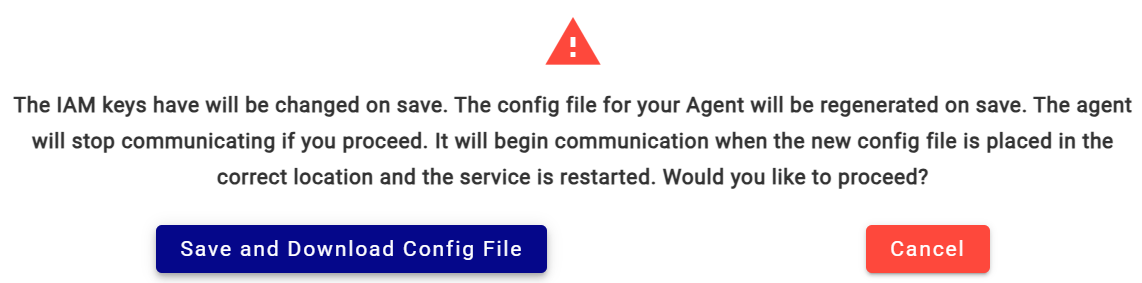
Save and download the config file
When saving, a Save and Download Config File prompt will appear. Keep this file — it is required after the MSI installation.
Setting up 2.0 Protocol for AWS Cloud
Create an IAM user with access to the S3 datalake. One user per agent is recommended; grant write permissions only (no deletes). Attach the following policy (replace <datalake-bucket> with your bucket name):
{
"Statement": [
     {
        "Action": [
            "s3:ListBucket",
            "s3:GetBucketLocation"
    ],
   "Effect": "Allow",
   "Resource": "arn:aws:s3:::<datalake-bucket>",
    "Sid": ""
   },
   {
        "Action": [
           "s3:PutObjectAcl",
           "s3:PutObject",
           "s3:GetObjectVersion",
           "s3:GetObject"
   ],
 "Effect": "Allow",
 "Resource": "arn:aws:s3:::<datalake-bucket>/*",
  "Sid": ""
  }
  ],
"Version": "2012-10-17"
}
Once the user is created, go to Security Credentials on the IAM user and generate Access Keys. Enter them in the Agent configuration with Protocol 2.0 selected.
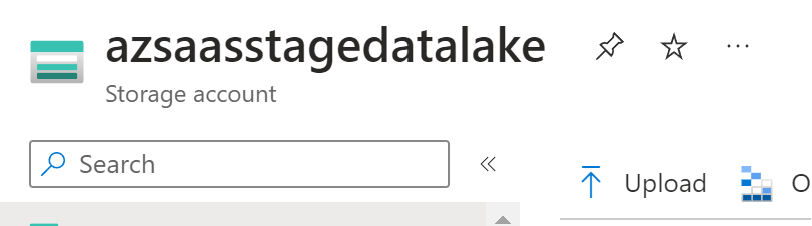
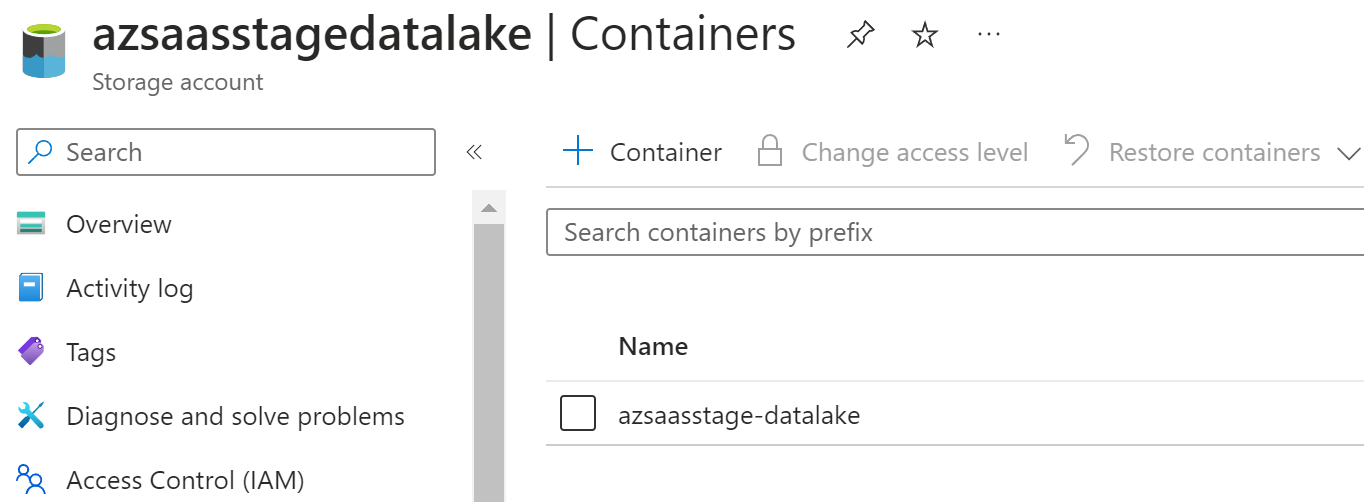
Setting up 2.0 Protocol for Azure Cloud
Configure the Agent with the following from the Azure Storage Account:
- Storage Account Name: The name of the storage account.
- Datalake Container Name: The name of the datalake container.
- Storage Account Key: Found in the Access Keys section. Select Key, not Connection string.
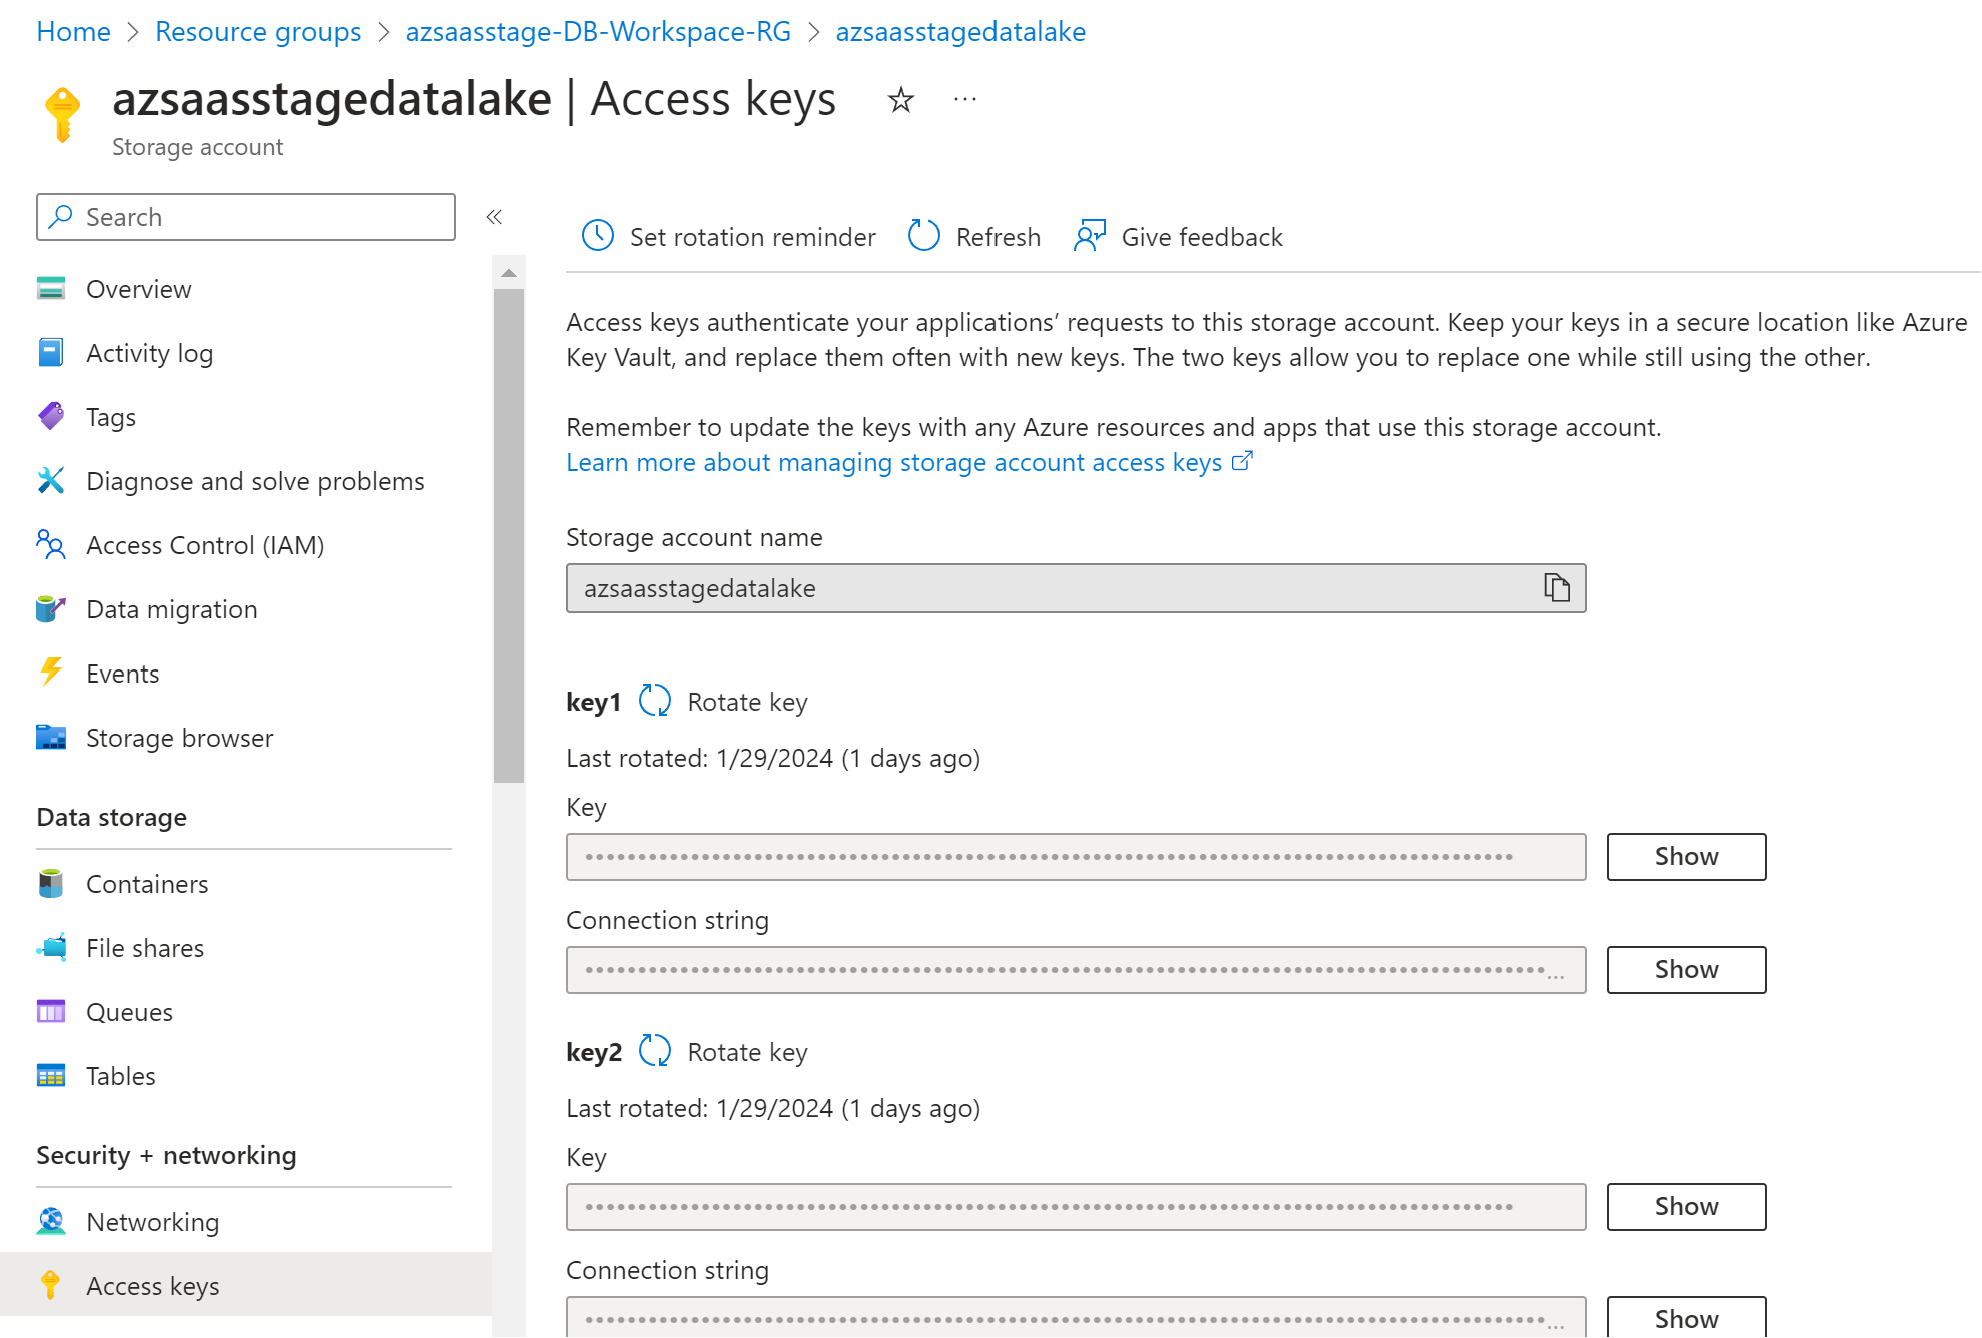
Ensure the storage account's networking settings allow access from the Agent machine.
Finding the Agent MSI Install File
In the DataForge UI, navigate to Agents and click Download MSI.

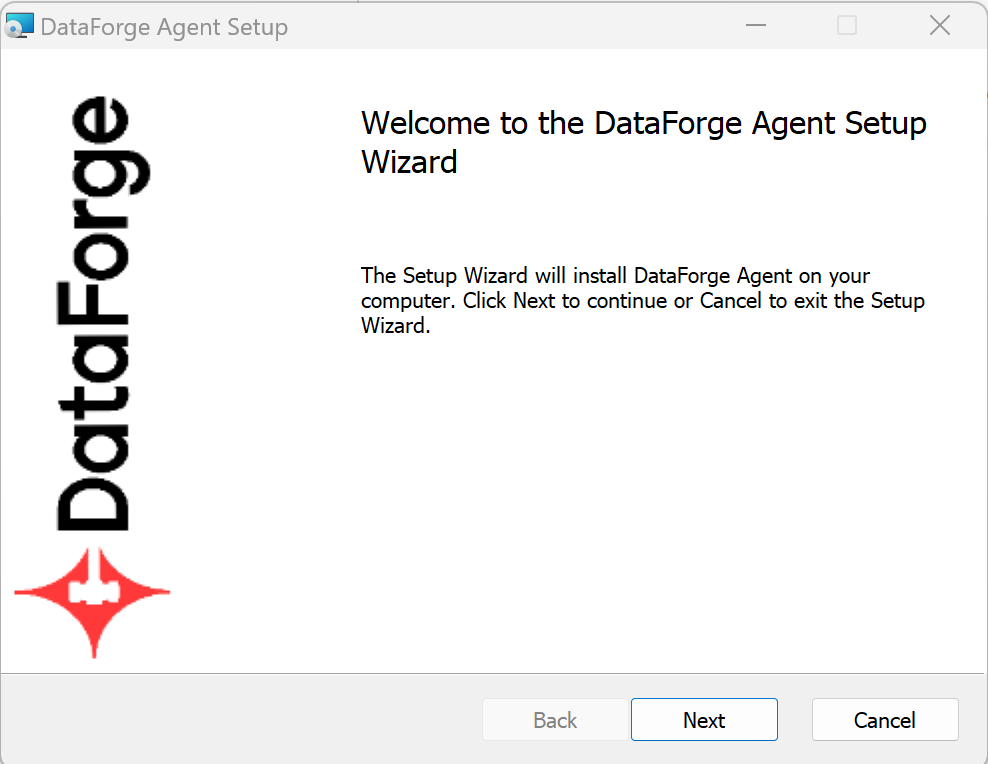
Installing the DataForge Agent (Windows)
Run the MSI installer and follow the prompts.
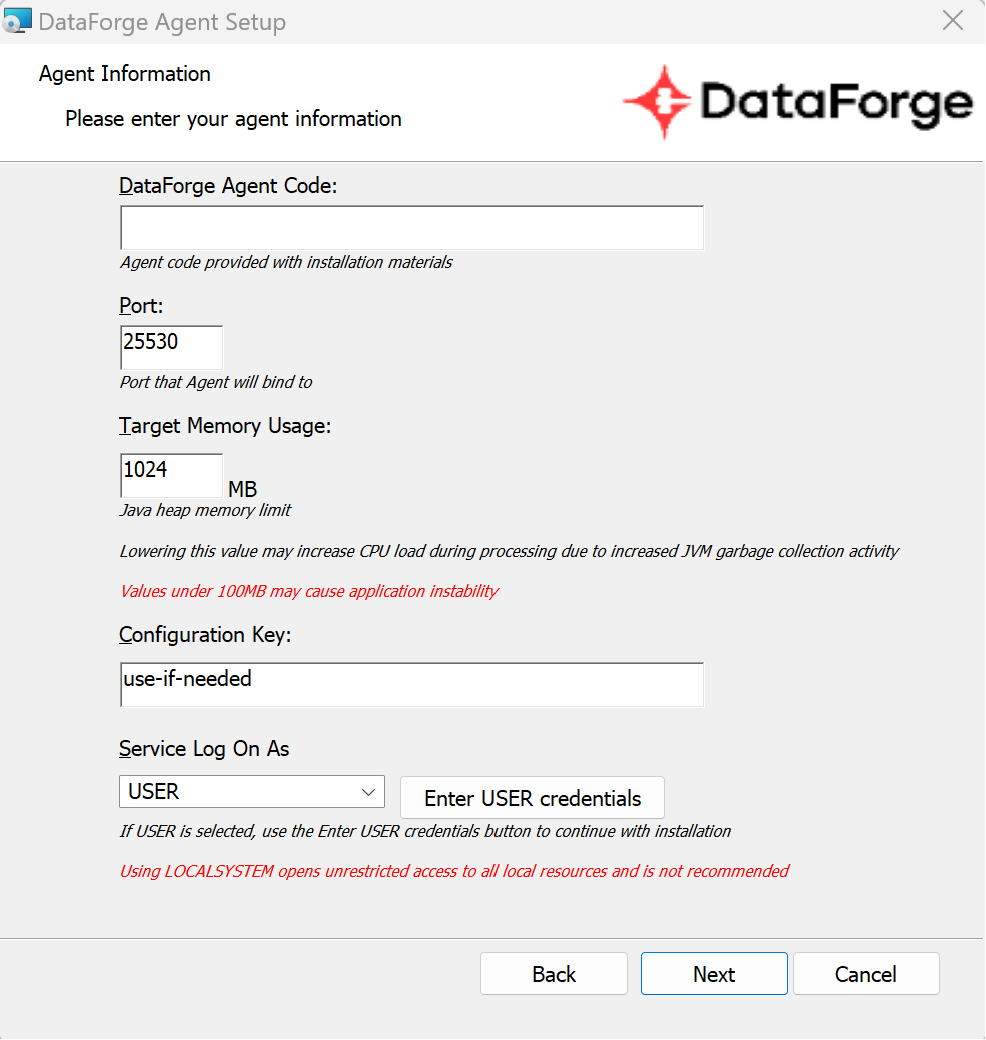
Enter the Agent Code configured in the DataForge UI. Leave the port at the default (25530) unless this is not the first agent on the machine — only one Agent per machine is supported. Do not alter the configuration key unless directed by a DataForge team member.
- USER service account: Click Enter USER credentials and provide credentials.
- LOCALSYSTEM: Select LOCALSYSTEM in the "Service Log On As" dropdown, then click Next.
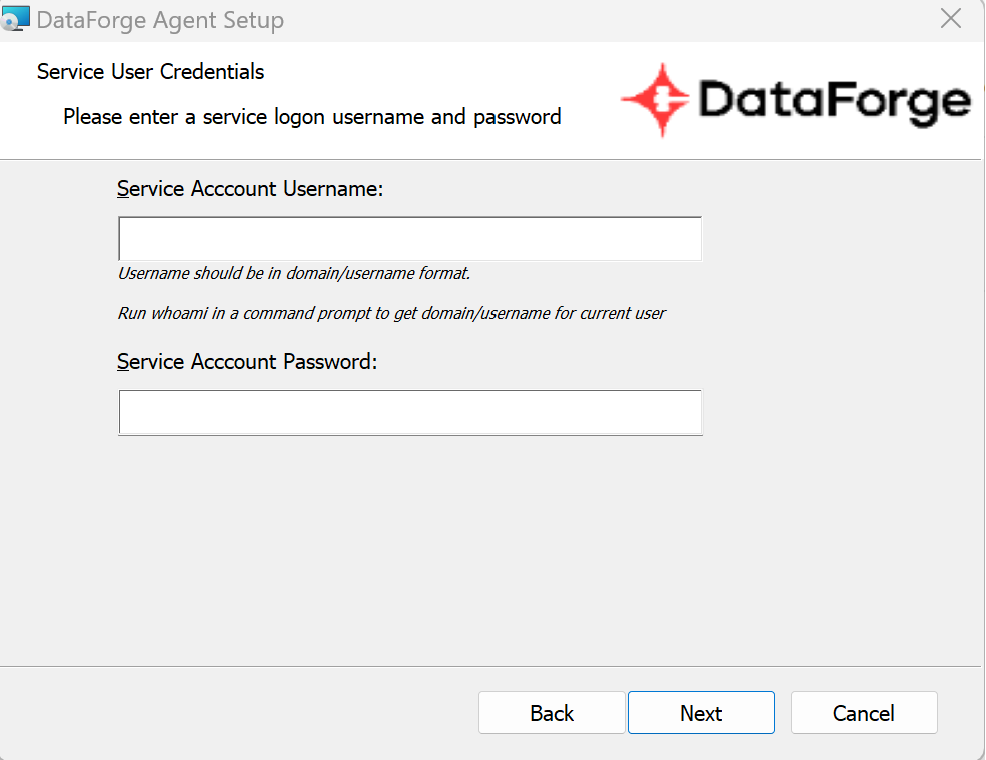
The service account username must include the domain or server name:
<domain>\usernameor<server>\username. Runwhoamiin a terminal to get the fully-qualified username. The account needs permission to run services and access source data folders. An alphanumeric password is recommended.
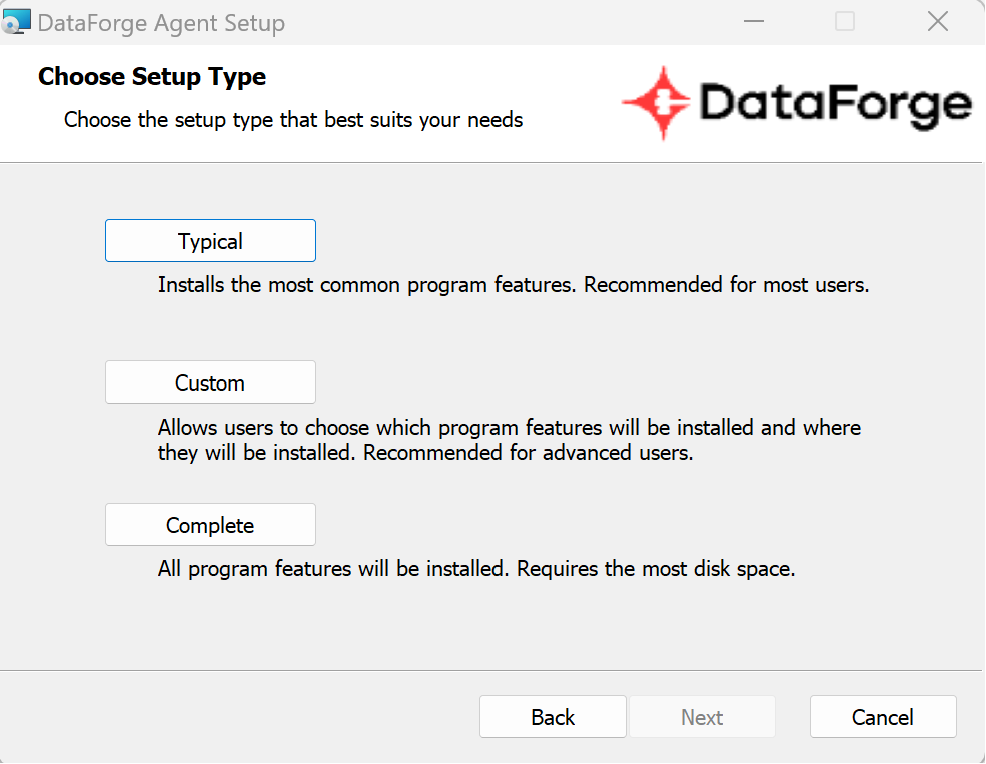
Select Typical on the setup type screen, then click Next to proceed to the final step.
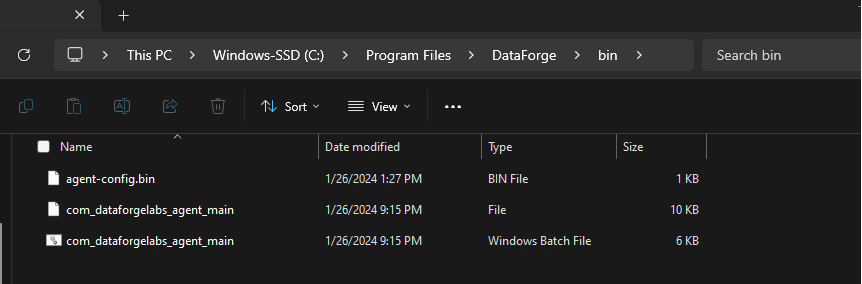
Place the agent-config.bin file and restart the service
Move the agent-config.bin file downloaded when the Agent was saved to: C:\Program Files\DataForge\bin
If the config file was lost, make a minor change to the Agent settings and save again to trigger a new download.
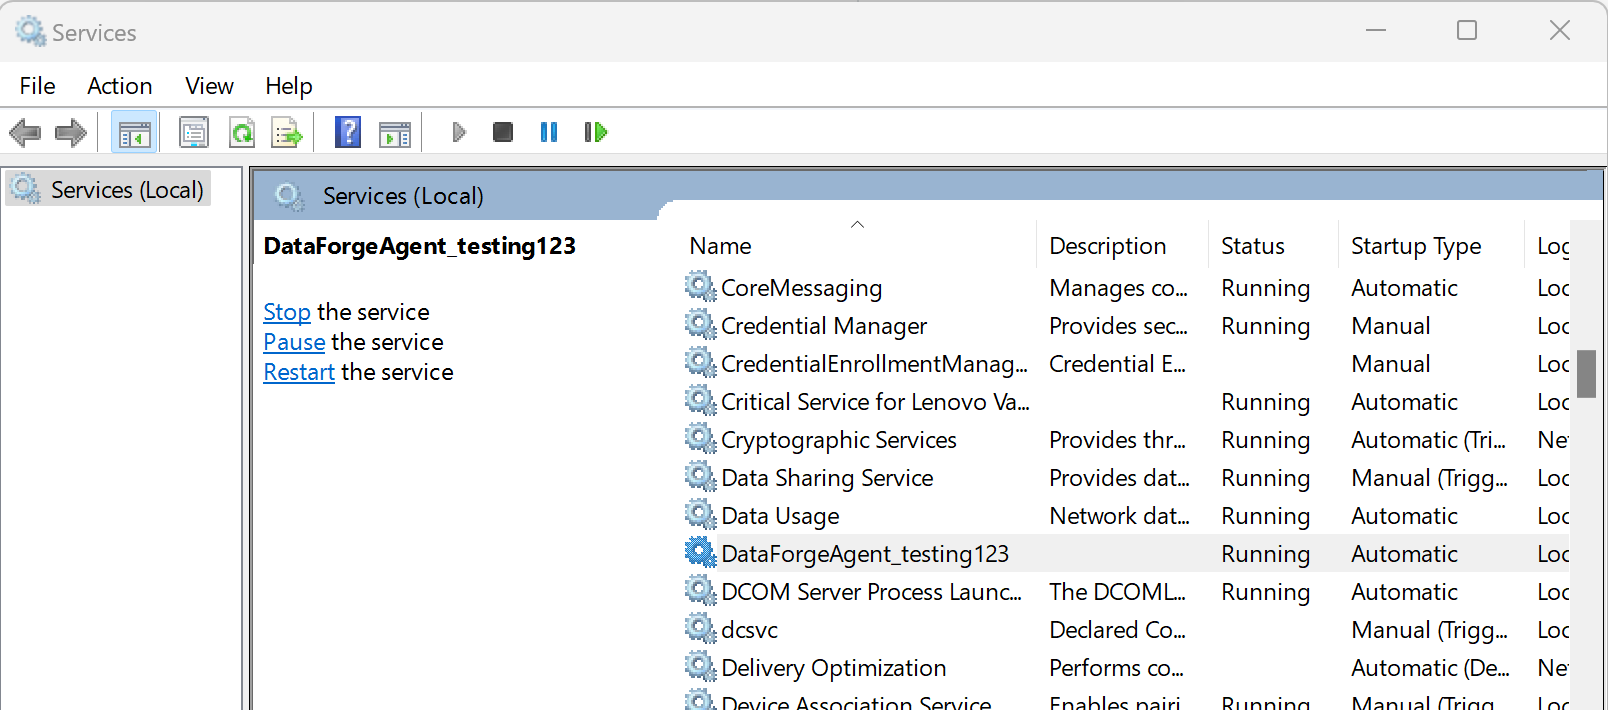
Open the Windows Services app and restart the service named DataForgeAgent_[agent-code] (e.g., DataForgeAgent_Dev).
Navigate to Agents in the DataForge UI. A green status icon confirms the Agent is communicating. Check the Agent logs to verify it is heartbeating.

Troubleshooting Installation
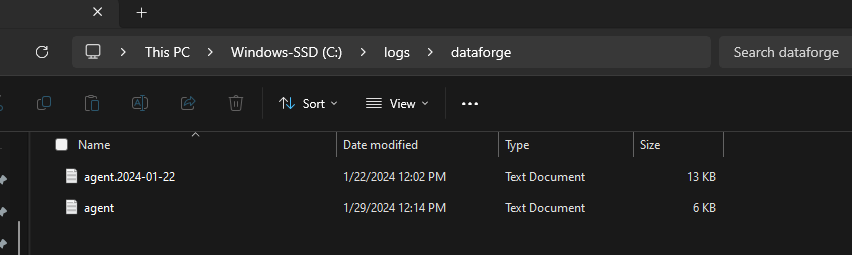
If the Agent doesn't show a green status icon within 5 minutes, review all configuration steps above, then check the log files at C:\logs\dataforge\. The current log file is agent.log.
A common error is a misplaced or misnamed config file. If the logs show the error below, confirm agent-config.bin is in the correct location and the service has been restarted.

If the Agent is still not running, contact your DataForge client team.
Common Install Errors
- No log files in
C:\logs\dataforge: Java is likely not installed or is the wrong version. Runjava -versionin a terminal — you should see output likeopenjdk version "21.0.3". See the Prerequisites section for requirements. - Service account permission issues: The account must have access to Program Files and the ability to create/run services.
- Missing domain in username: Enter the fully-qualified username (e.g.,
productionserver\user123). Runwhoamito get it. - Special characters in password: Use an alphanumeric password.
- Service name conflict from a previous install: Run
sc delete IntellioAgent_<agent-code>in an Administrator terminal before reinstalling. - Empty or incorrect Machine GUID: Check
C:\logs\agent.log— if the GUID is blank, uninstall and reinstall with the correct GUID entered in the configuration-key prompt. - Misplaced config file: Ensure
agent-config.binis inC:\Program Files\DataForge\binand the service has been restarted.
For MSI install failures matching the error below, look in C:\Users\<username>\AppData\Local\Temp for the most recent file starting with MSI — its contents will describe the error.

Uninstalling the DataForge Agent
Recommended: Re-run the original MSI installer, click Remove when prompted, enter the agent code, and complete the removal. If the original MSI is unavailable, open Add or Remove Programs, choose to Modify the DataForge Agent entry to open the MSI, then click Remove.
Alternatively, remove the program directly from Add or Remove Programs. After doing so, you must also manually remove the Windows service. Open a command prompt as Administrator and run (replacing DataForgeAgent_Dev with your service name):
