Recommended Compute Configurations during Development
For environments that are undergoing daily development, it may be beneficial to set up your compute configurations to keep fully-warm compute to reduce startup times. By adjusting the compute idle settings, you can set up your compute configuration to keep compute warm all day.
Infrastructure Basic Overview
Before we detail the recommendations, it is important to have a basic understanding of the layers of infrastructure involved with compute provisioning
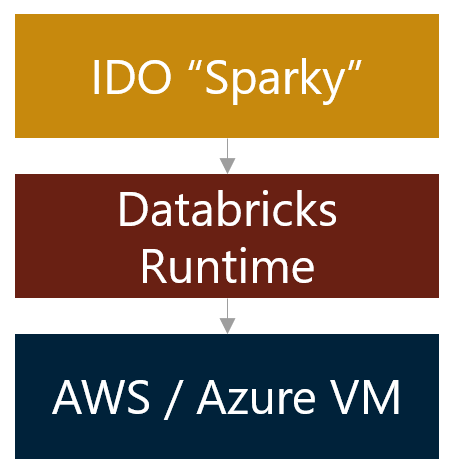
Using the default configurations, DataForge requests a specific compute from Databricks, who then in turn requests the associated virtual machines (VMs) from the cloud provider.
Databricks waits for the VMs to be provisioned by the cloud provider before installing and booting up their Runtime on those newly provisioned machines.
Finally, Databricks installs the DataForge Sparky codebase on top of their runtime - at which point DataForge begins the coordination of data processing.
This provisioning and installation process can take 1-5 minutes depending on a number of factors, during which you will see the "Launching Compute" status in the DataForge user-interface.
Databricks Pools
To avoid or reduce the time spent waiting for the Cloud Provider to provision the virtual machines every time a new compute is requested, Databricks offers a feature called Pools.
Pools allow users to configure a set number of VMs to remain provisioned even after a job has finished running. For more details, see the Databricks Documentation.
These waiting "warm" VMs consume cloud provider credits, but do not consume Databricks Credits (DBUs) or Processing Units.
Unfortunately, Pools only eliminate the VM cloud provider provisioning time. They do not reduce or eliminate the Databricks Runtime installation or DataForge Sparky installation processes required to execute DataForge processes.
DataForge Idle Compute
To fully eliminate the compute launch wait times, DataForge includes a configuration option called "Idle Compute". These settings allow users to specify how many, and with what auto-shutdown timing DataForge keeps fully-warm compute ready to execute DataForge processes.
These waiting "warm" compute consume cloud provider credits and DBUs, but do not consume Processing Units while not executing a DataForge process.
The following guide details how to configure a common configuration of DataForge Idle compute for a development environment to prevent developers from constantly waiting for compute provisioning.
Building a Compute Configuration for Development
Start by navigating to the Compute Configurations page within your DataForge environment (Menu -> System Configuration -> Compute Configurations). A version of this type of compute configuration is already created for you called "Developer" that is automatically created in every environment. You can use this compute configuration or choose to create a new, similar configuration. The Developer Compute Configuration has an idle timeout of 30 minutes, meaning it will shut down if there is a 30 minute period of inactivity and will start up again when a new process is initiated.
Creating a New Developer Compute
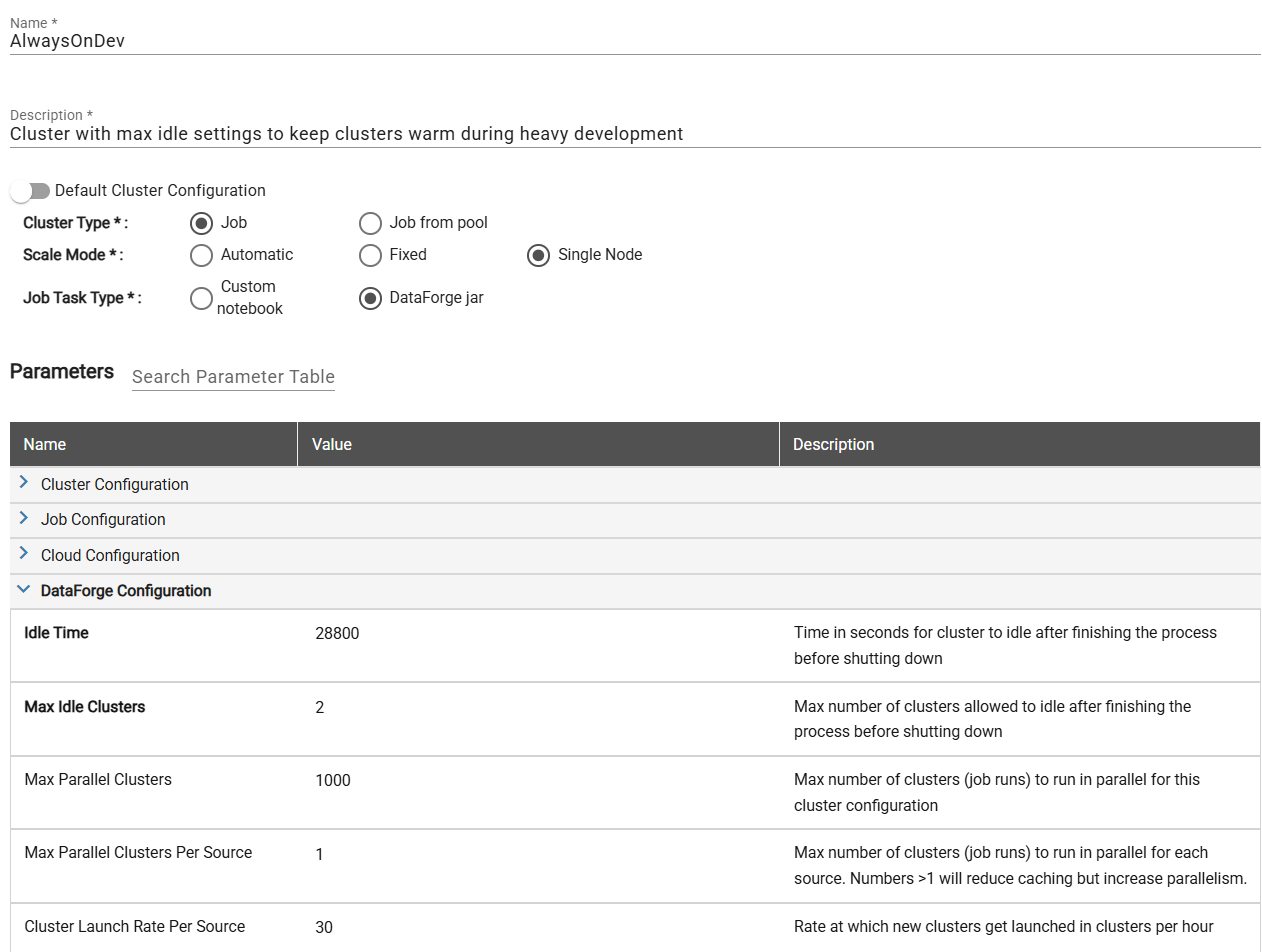
To create a new compute configuration that you'll be able to reuse, click the New + button on the compute configuration page. The name and description can be whatever makes sense for your team. In this example, we've named the compute "AlwaysOnDev" to make it easily known that this compute is meant for development purposes.

When you set up the compute config, you will need to select the Compute Type, Scale Mode, and Job Task Type. Set the compute type to Job, scale mode to Automatic, and and Job Task Type to DataForge jar. The Job Task Type should always stay on DataForge jar unless the compute is being used for Custom Ingest, Custom Parse, or Custom Post-Output notebooks.
You may optionally specify "Job from pool", but because we plan to keep these compute fully warm, there is very little benefit to Databricks pools - thus we recommend not using Databricks Pools for this configuration.
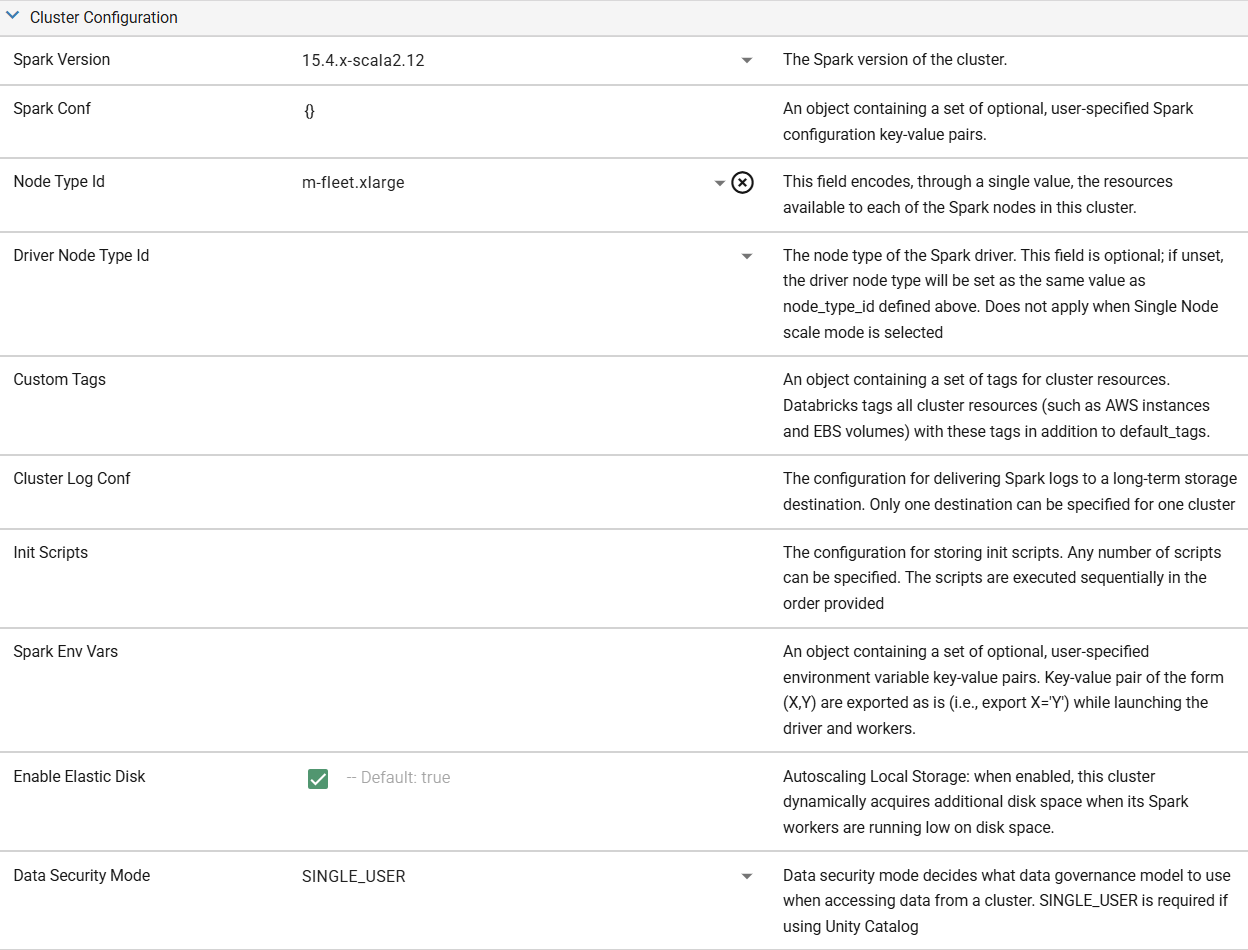
Once the basics are established, you'll begin to tweak the Parameters of the compute config. For this configuration, we recommend keeping the default Node Types and settings. The default settings combined with Scale Mode set to Automatic will work well for almost all development and testing processes.
If working with small datasets (<10MB), it may be beneficial to set up a Single Node compute to improve compute efficiency and performance, while limiting cloud costs by only utilizing one node (the driver node) for the compute with no worker nodes. To make any compute a Single Node compute, change the Scale Mode to "Single Node".
The last section of Parameters is the DataForge Configuration. This is where you will be able to adjust the idle settings of the compute. For our purposes, we will set the Idle Time to be 28800. You can think about this number by converting the length of time you'd want to keep the compute warm into seconds. In our example, the 28,800 represents 8 hours in a day * 60 minutes per hour * 60 seconds per minute. This effectively keeps the compute alive for the entire work day - with developers only having to wait for a compute launch one time in the morning across the entire environment.
To set an Idle Time greater than 10 hours (36,000), you will also need to adjust the parameter "Timeout Seconds" under the Job Configuration section of the Compute Configuration Parameters. This setting is a Databricks-level parameter that protects against long-running rogue processes, however it will kill any idle compute alive for longer than this setting.
The other setting that is important to tweak in this heavy development use case is the Max Idle Compute. A good way to think about this setting is how many developers will you have working in this environment at the same time. Similarly, how many sources are they kicking off at the same time. The rule of thumb is ~1.75 compute per developer, rounding up for a quicker experience or down if you are okay potentially waiting as compute are stood up from time to time. Rounding up, we set the Max Idle Compute to 2 in our example since we only expect one developer to be active in the environment at a time.
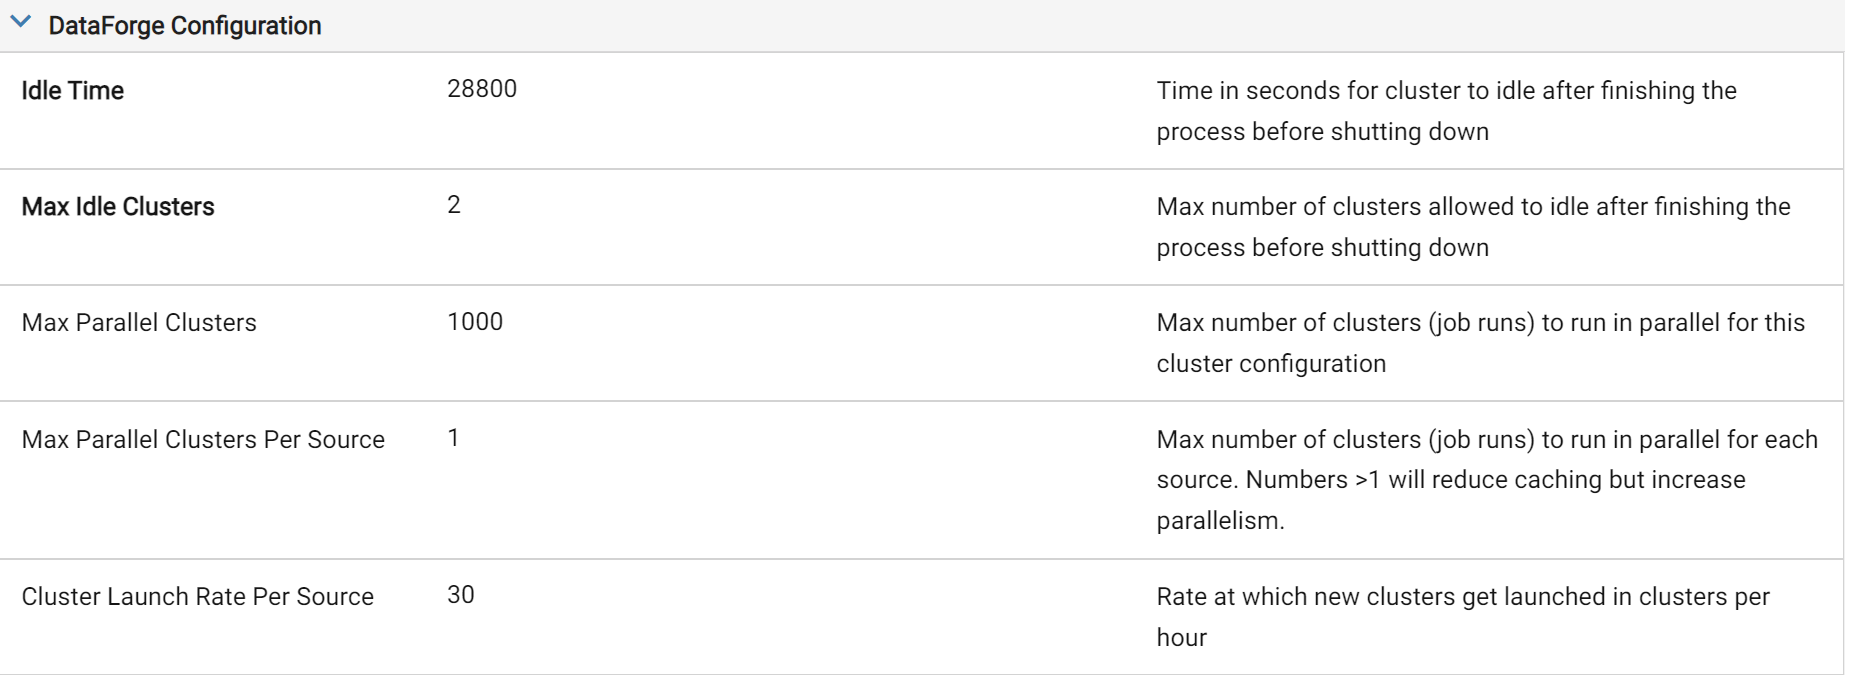
These are the main two settings for a good compute configuration while in a heavy development phase. You can also play around with Max Parallel Compute Per Source and Compute Launch Rate Per Source to find what works best for you. Below is a completed screenshot of everything we've talked about so far. Be sure to save the compute configuration when you are done making changes.
The last steps are to attach this Compute Configuration to a Process Configuration (also under Menu -> System Configuration) and associate the Process Configuration to the sources that you will be doing development on. Below are screenshots of what each of those steps look like.
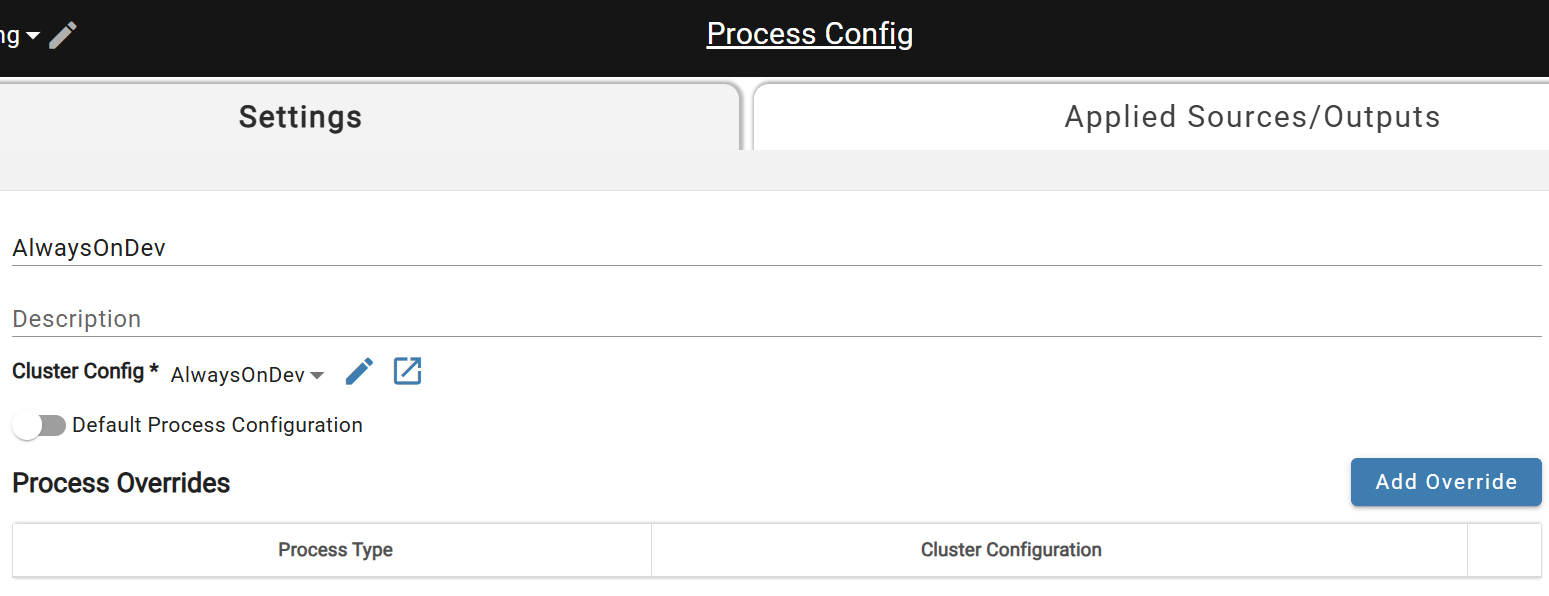 Create new Process Configuration for Compute Config
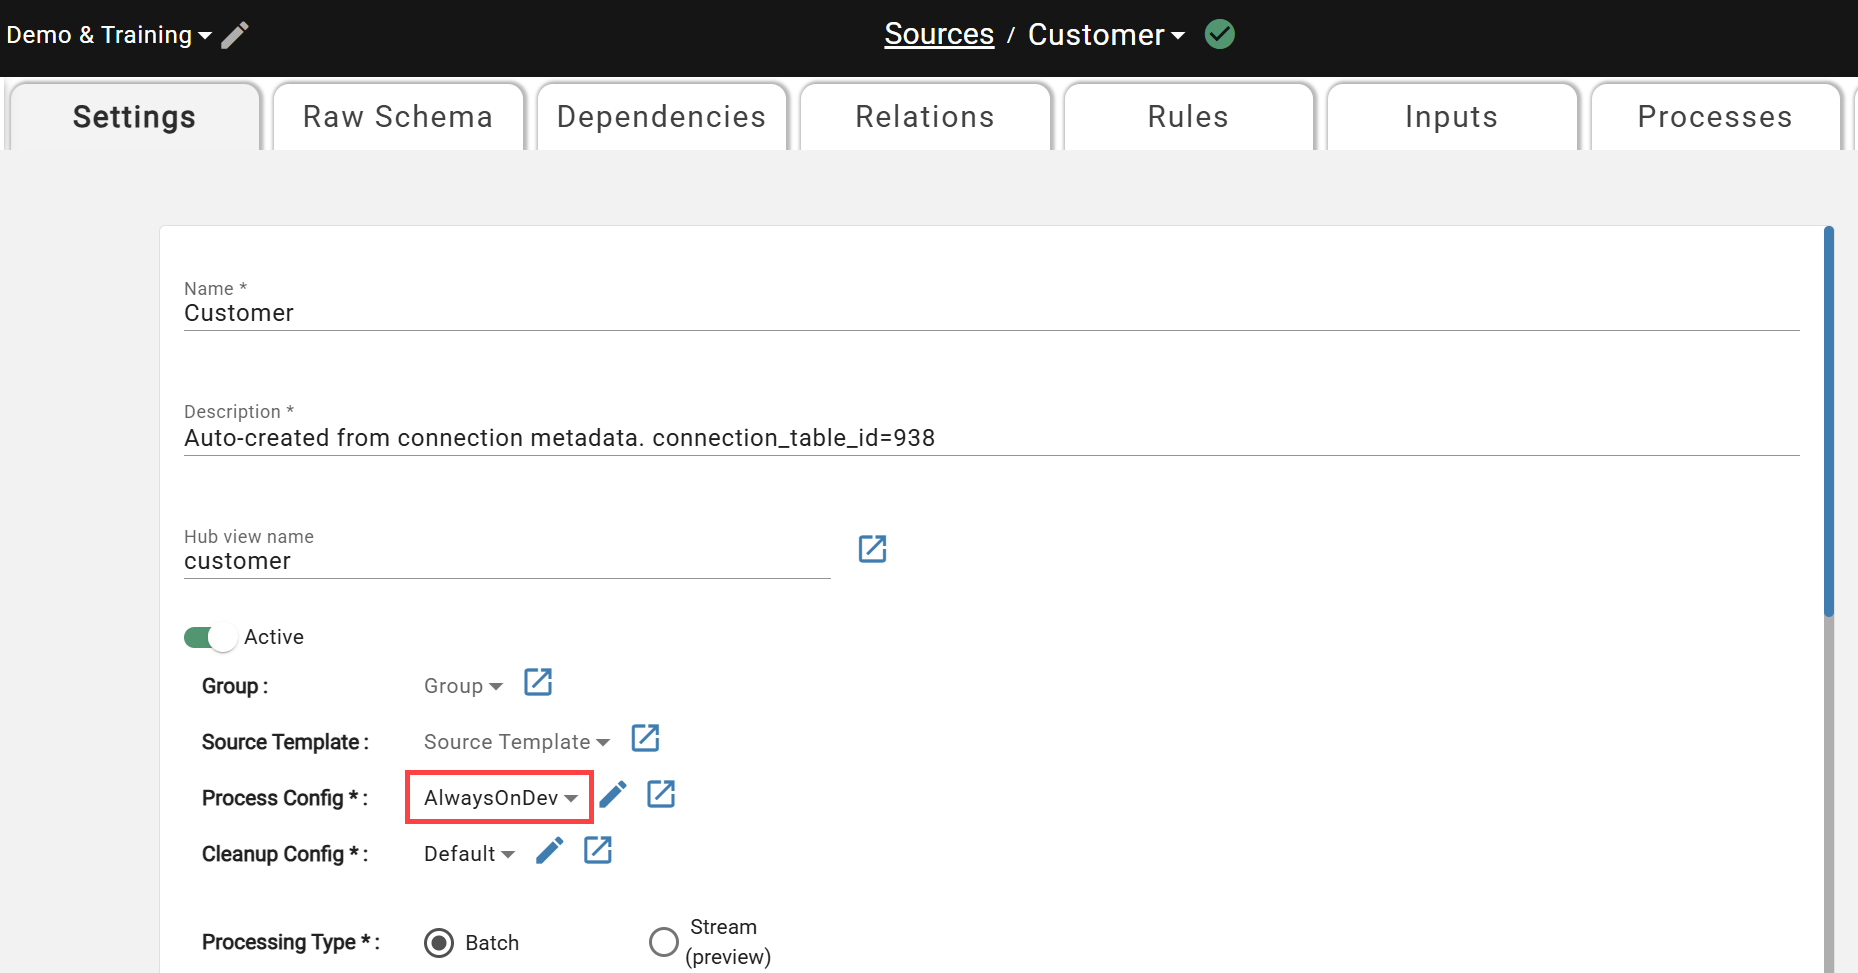 Attach Process Configuration to Sources in Development
Finally, be sure to change the associated Compute Configuration to a more cost-effective alternative when promoting to Production or testing daily runs prior to promotion. While useful for efficient development cycles, keeping the compute alive/idle while not in use can cause significant unexpected cloud and Databricks costs.