Projects Overview
Projects represent a group of configurations in DataForge that users control and are the primary vehicle for migrating changes.
Projects support DevOps best practices via direct GitHub integration — connect projects to branches and repo paths. See Managing Projects with GitHub for details.
When project configurations are imported to other projects, it is a full replacement of all objects within the project.
Every project consists of the following objects:
- Sources
- Outputs
- Templates (including all sub-categories of Templates such as Tokens and Groups)
- Project variables
- Relations
The objects that are global to an environment are the following:
- Connections
- Schedules
- Agents
- Cleanup, Compute, and Process Configurations
Note: All global objects not contained in projects must exist in the target DataForge environment of the project the user is importing into. For example, if a connection named "Sql Server" is in use in the project exported, a connection named "Sql Server" must be created or already exist in the Connections of the DataForge environment the project lives in that the user is importing into.
A Default project will be created automatically by DataForge. All environments upgrading from 6.2.x DataForge environments will automatically have all sources, outputs, and templates moved into the Default Project.
Common Project Use Cases
There are two primary intended uses for Projects which are listed below. Projects are intentionally not tied to any specific set of sources or environments so users have full control of managing the configurations in their environments.
- Migrating full environments between different stages of Development, Testing, and Production. Each project contains a full set of all sources, outputs, and templates developed in DataForge.
- Maintaining multiple projects for independent workstreams. This assumes users have multiple "live" projects that each contain different sources, outputs, and templates related to separate workstreams.
Project UI
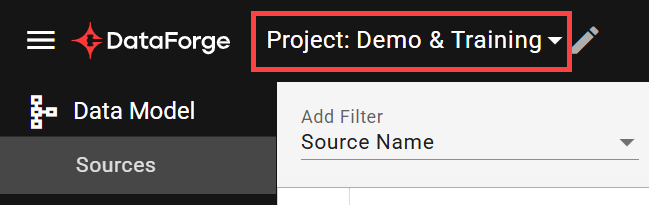
The active project is shown in the Project drop-down (top-left) on Sources, Outputs, and Templates pages. All projects are accessible via Main Menu → Projects.
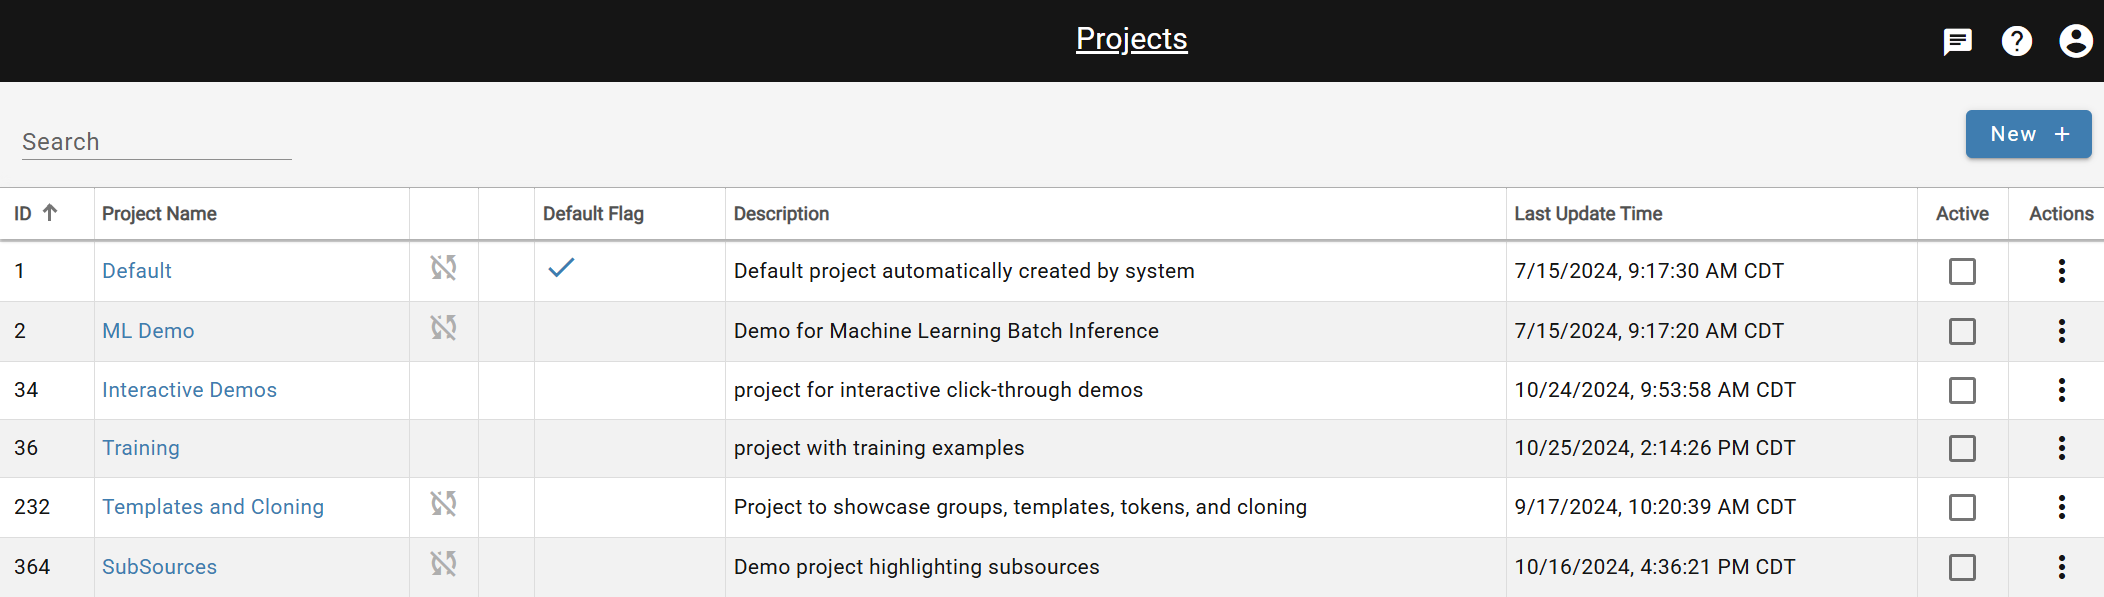
ID:Unique ID associated with each project in the workspace
Project Name:Name of the project
Status Columns: Disabled ingestion is indicated by a cycle icon with a strike through it. Locked project is indicated by a lock icon.
Default: Initially indicates the project was created by DataForge infrastructure. A project can be changed to the default by opening the project and selecting the Default option. Only one project can be the default project at a time.
Last Update Time: Shows the latest timestamp that the project was created, updated, or imported into.
Active: Indicates which project the user is currently viewing in the UI. Also indicated by the Project drop-down in the UI header next to the main menu.
Actions:Triple-dot menus provide the ability to roll back configurations to a previously successful import or retry a previously failed import.
Creating a New Project
Click New + on the Projects page.
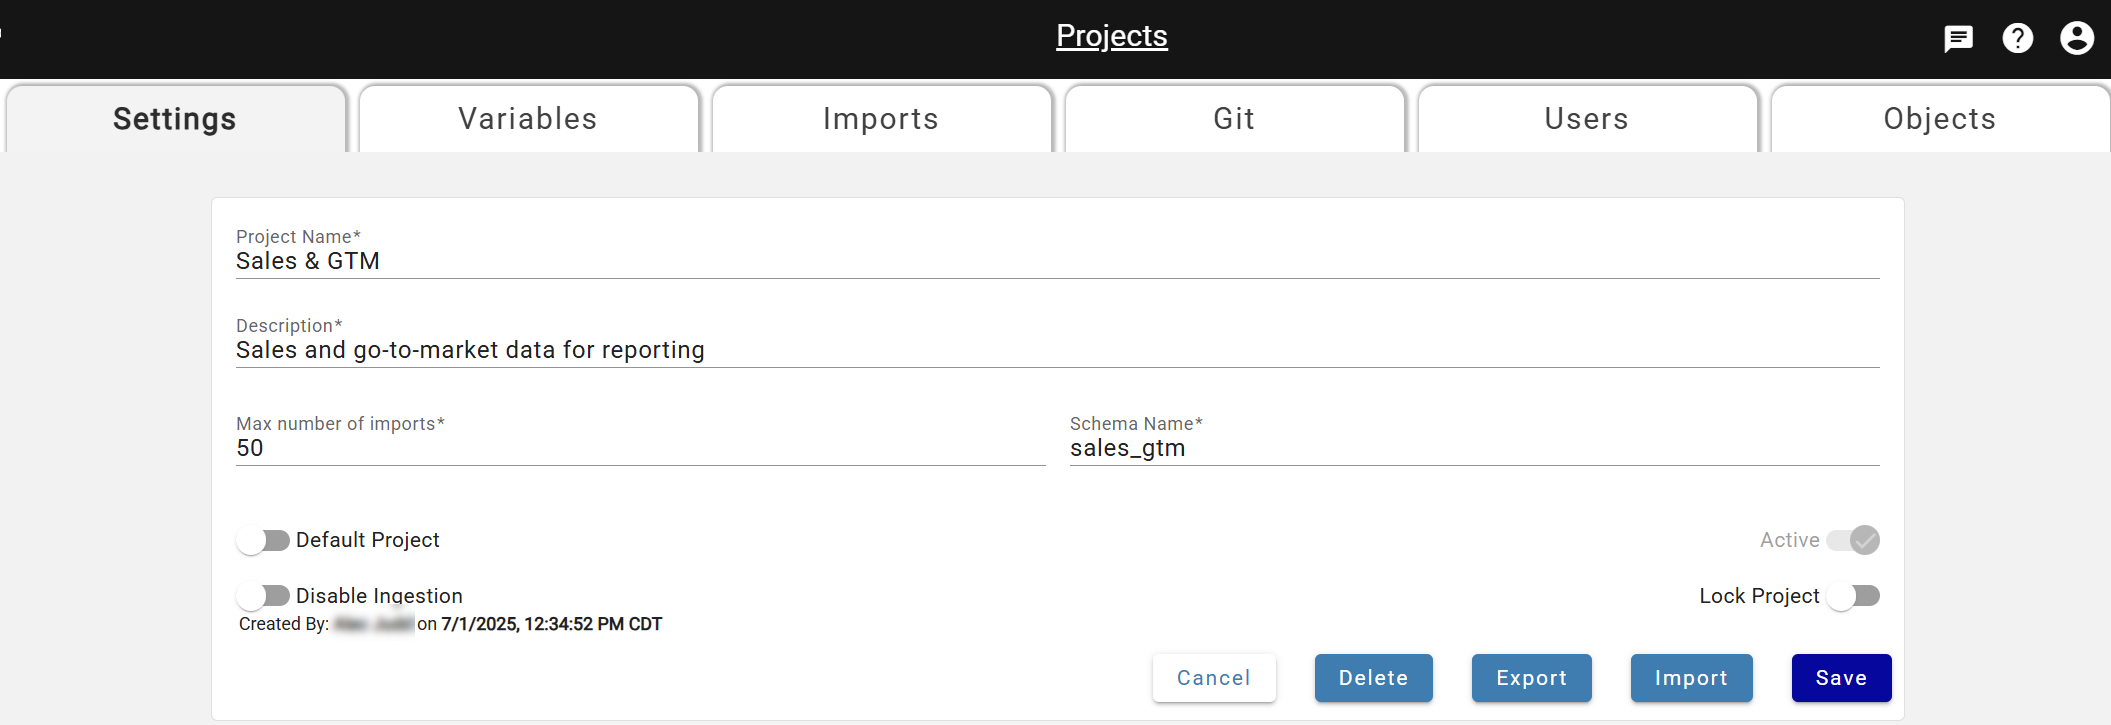
Project Name: User-defined project name that can be edited as needed.
Description: User-defined description for the project that can be edited as needed.
Max Number of Imports: Defaulted number of imports the user wants to allow for the project that can be edited as needed.
Hub View Schema: User-defined schema name for the hub views of sources and outputs within the project. This defines which schema users would query in their data platform to view data. Please note this can not be changed after it is saved to a project.
Default Project: Dictates which project users view when first logging into DataForge. Also used in custom ingestion and custom post-output sessions when the user does not define the project name in the notebook.
Active:Indicates which project the user is currently viewing in the UI. Changes as users select different projects in the project drop-down of the UI header.
Disable Ingestion: Toggle to disable ingestion from running on all sources within the project. Can be turned on or off at any time.
Lock Project:Toggle to only allow configuration changes within the project via Project Import. Removes the ability to edit sources, outputs, or templates manually.
Click Save to create the project. The creator is granted access by default.
Managing Project User Access
Access is controlled via project roles. To change a user's access, open the project, go to the Users tab, and use the action options. See Manage Users for details. Each role includes all permissions from the level below it.
Owner: Write access to change project user access and can delete and rename project. Editor-level access to change configurations and operate processing.
Editor: Write access to configurations and ability to lock project and import to project. Has ability to enable/disable ingestions and operate processing.
Operator: Read-only access to configurations. Has ability to enable/disable ingestions and operate processing.
Read-only: Read-only access to configurations. No ability to operate processing.
Project Variables
Variables substitute object names at import time — an exported name is replaced with a project-specific value in the target. Variables persist on the project until deleted.
Variables can be added for the following objects types:
- Custom Compute Configurations
- Process Configurations
- Output Connections
- Output Schema Names
- Output Table Names
- Schedules
- Source Connections
Variables missing in the target project are auto-created as placeholders; the import is marked failed until they are populated. After populating, restart the import.
To add a variable: open Menu → Projects, navigate to the Variables tab, and click New +. Choose a variable type and name (appears as $<variable_name> in export files). Depending on type, select an existing configuration or enter an object name value. For Output Schema Name and Output Table Name, enter the schema or table name to substitute.
Example:
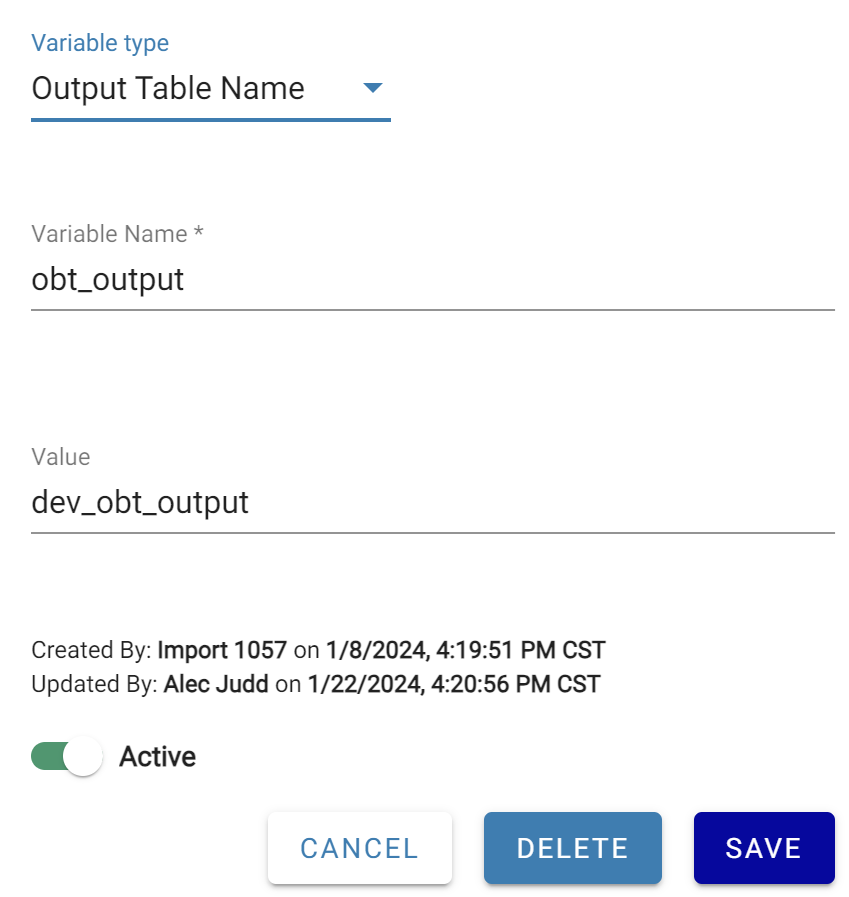
There are two projects, Dev and Prod. Each project has the same output using the same output connection and schema.
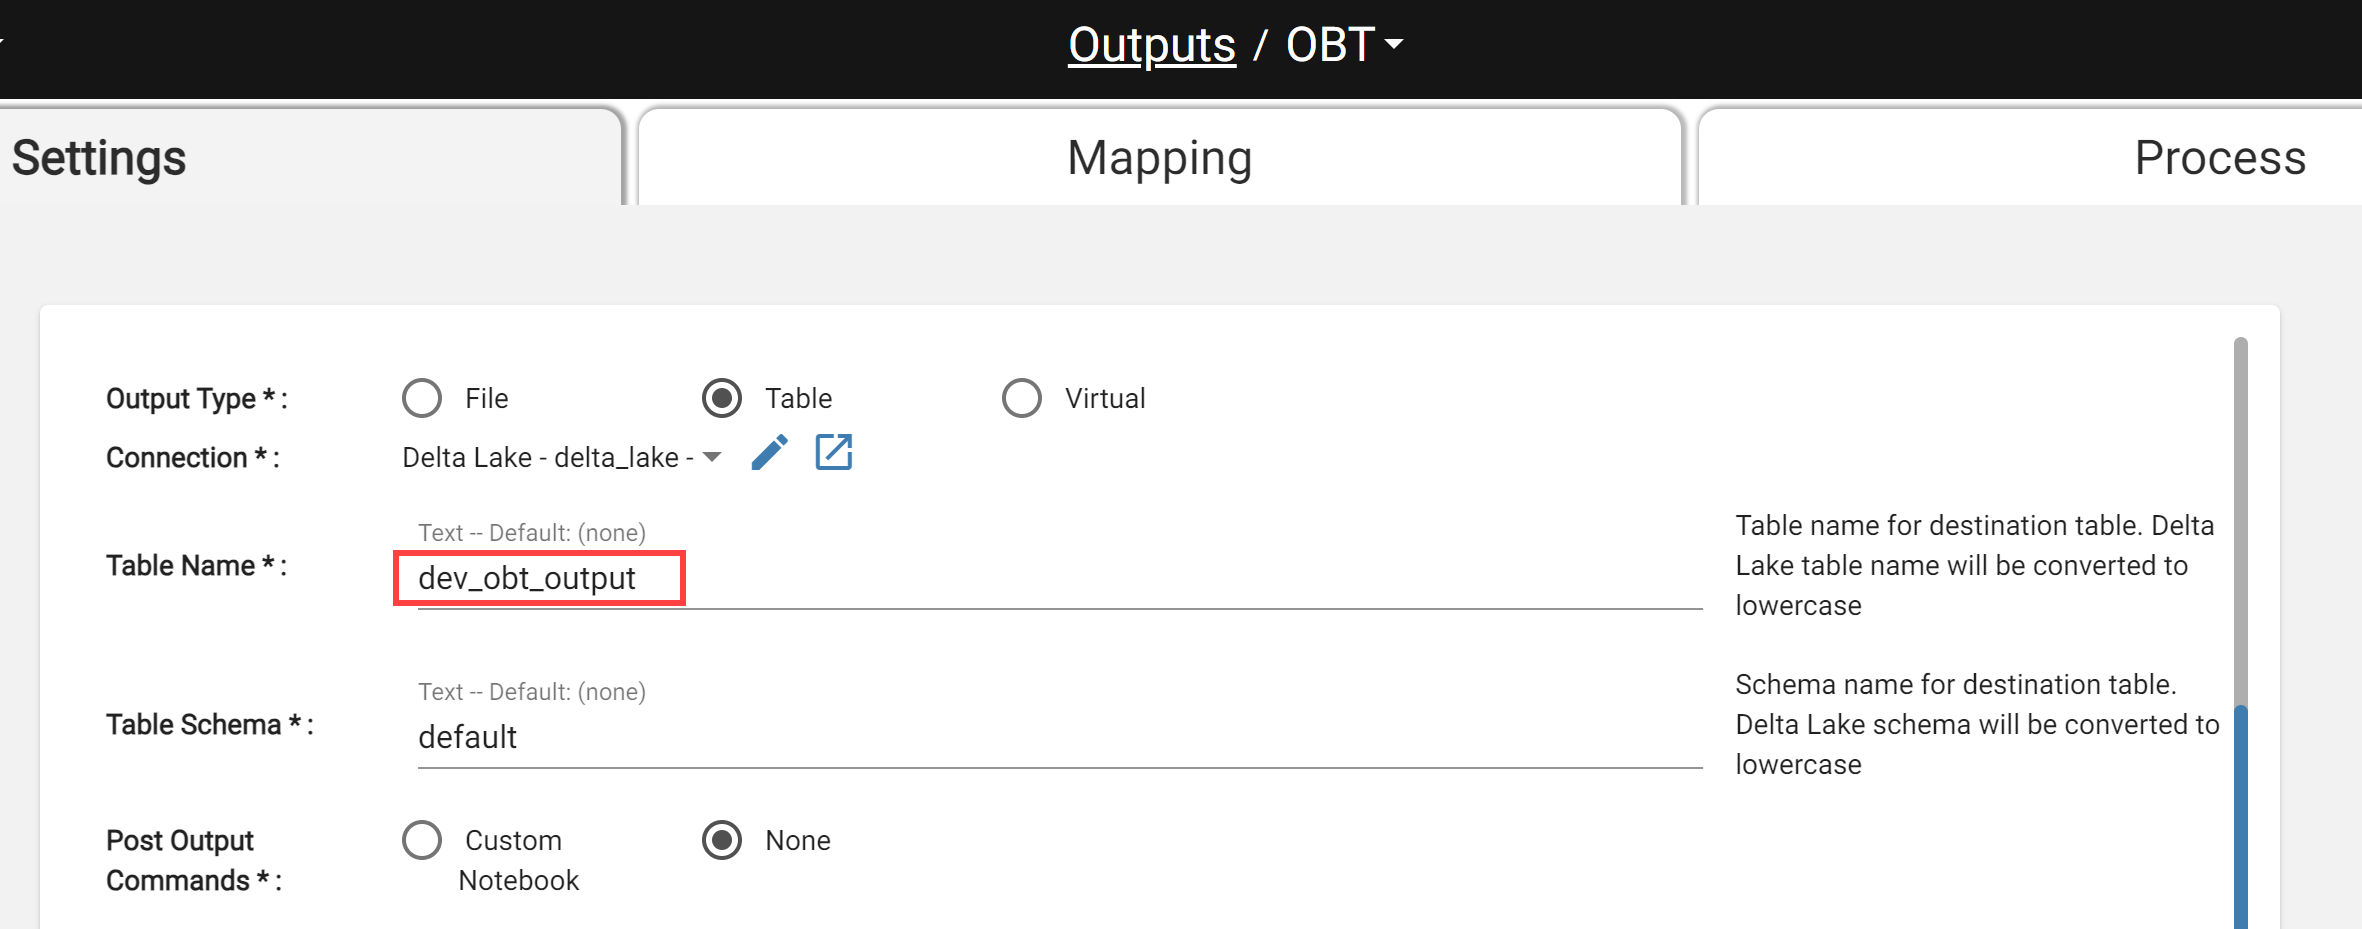
Both projects should not output to the same table so a Project Variable for Output Table Name should be added to substitute table names. This is the variable that would exist in the Dev project.
When the Dev project is exported, the yaml file for this output will have output table name replaced with the variable like below.
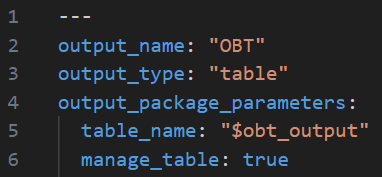
To finish this set up, a variable is created in the Prod project to match the variable name existing in the Dev project.
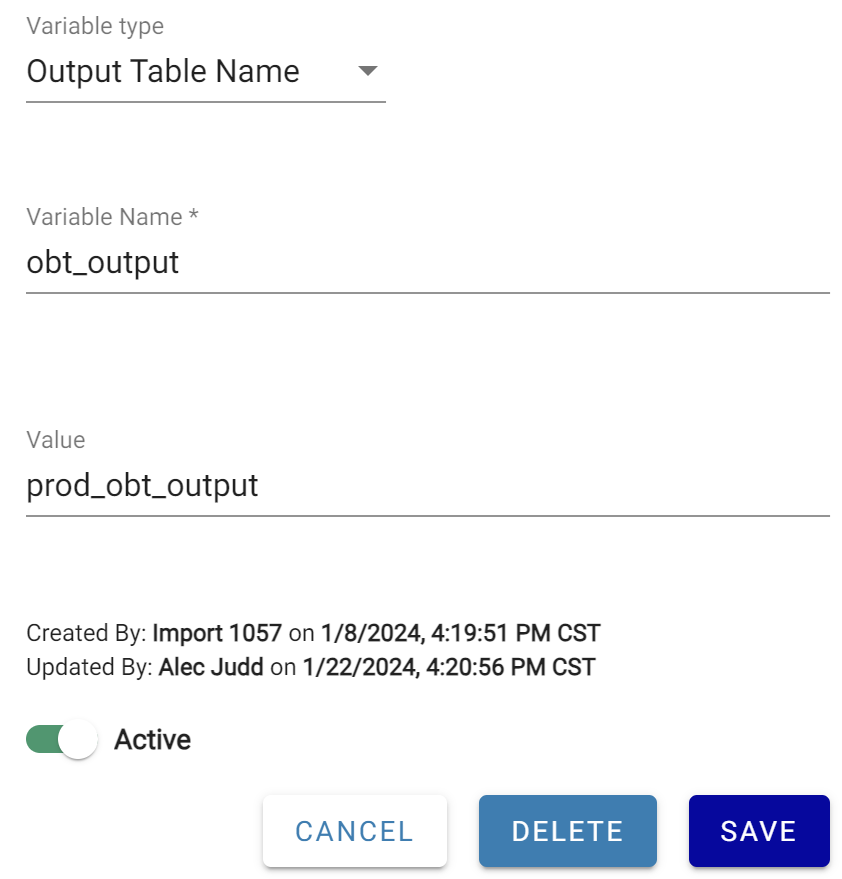
On export from Dev, dev_obt_output becomes $obt_output in the export files. On import into Prod, $obt_output is substituted with prod_obt_output.
Exporting a Project
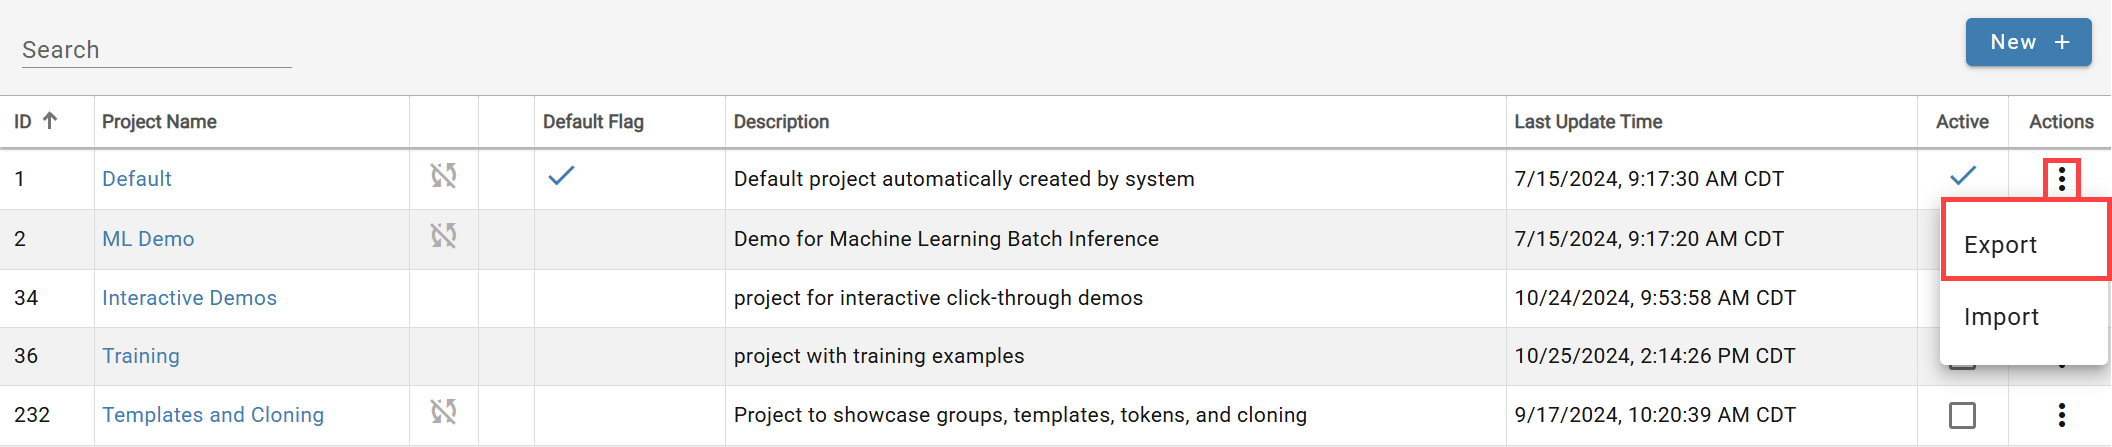
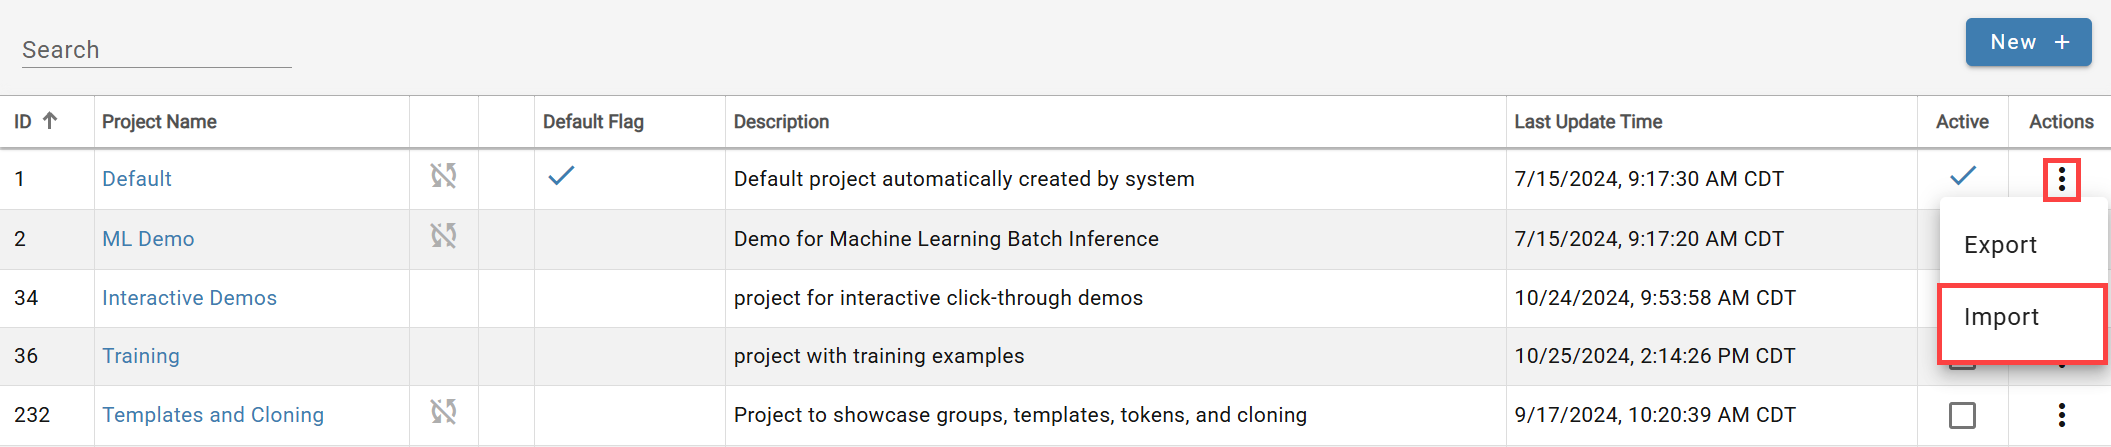
Select the triple-dot menu on the Projects page and choose Export.
The export produces a compressed zip folder with a standard structure: one YAML file per object in typed subfolders, plus top-level files:
- defaults.yaml: indicates all default values for settings that were not changed from product defaults. Simplifies yaml file contents by removing default values from every file.
- meta.yaml: indicates the export format version for DataForge to read.
- variables.yaml: exists if project variables were created and used in the exported project.
- relations.yaml: contains all source relation definitions in the following form:
- name: "[Source]-name-[Source]"
- expression: "[This].attribute = [Related].attribute"
- cardinality: "M-M"

Project Folder Structure
Importing a Project
Select Import from the triple-dot menu, choose the zip file, and confirm. All objects in the project are replaced by the import contents — including deleting objects not in the zip.

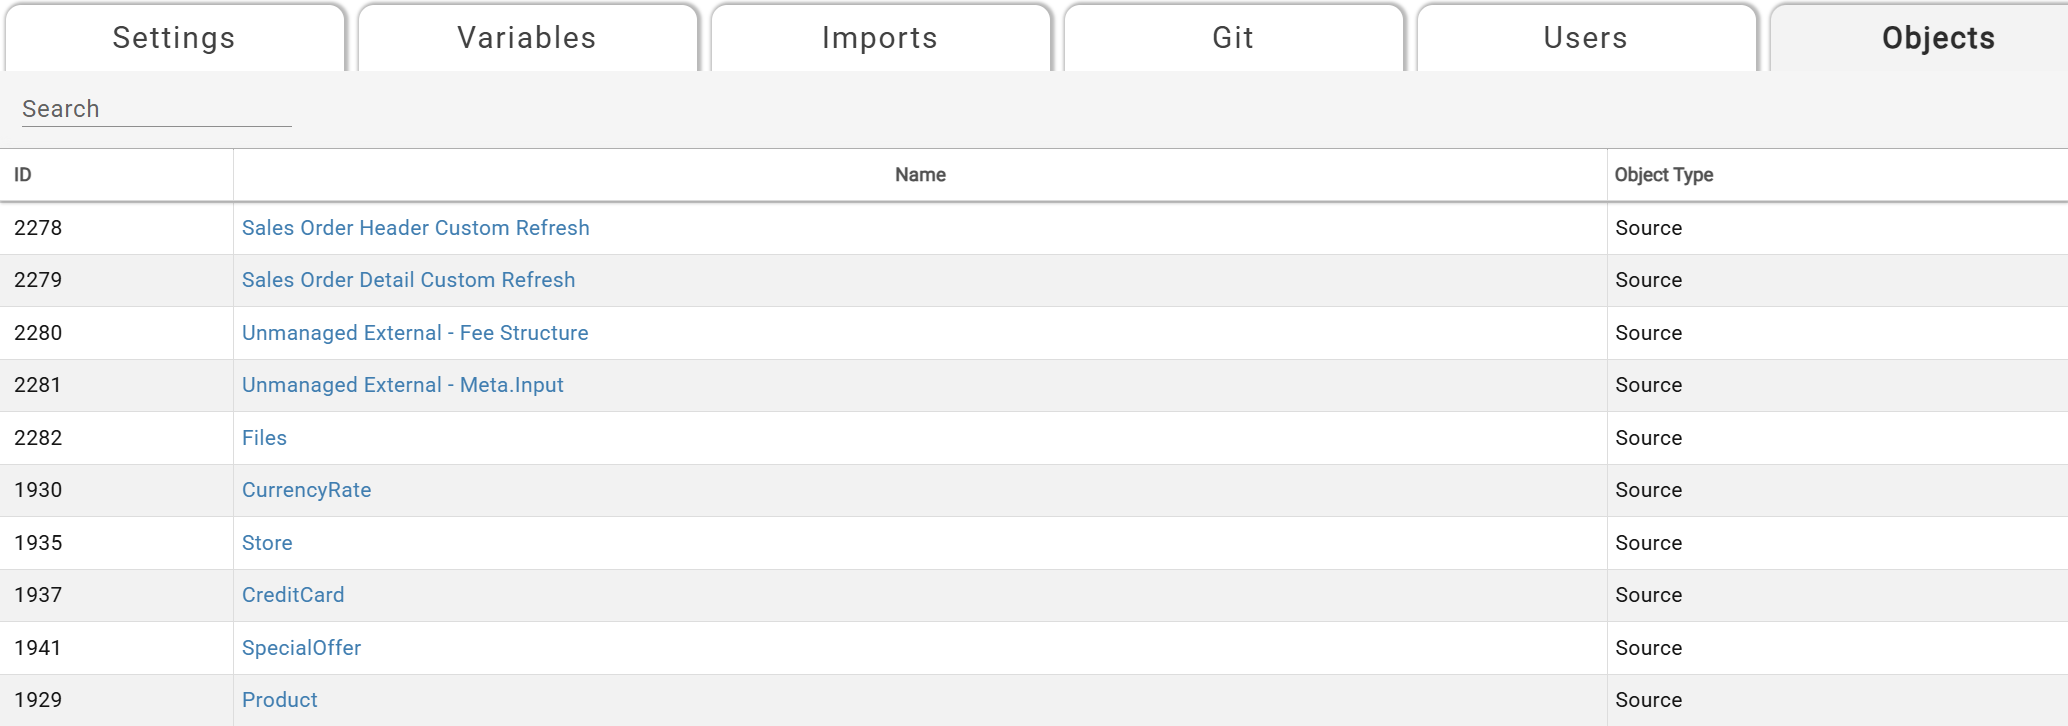
The Imports tab shows import status and the file used. If the import fails, click the Log icon to view the error. After a successful import, view all project objects on the Contained Objects tab; the log shows counts of updated and deleted objects.

Import Warning When Sources Will Be Deleted
If an import would delete existing sources, it is paused with a warning. Click the Pause icon to see details. Three options are available:
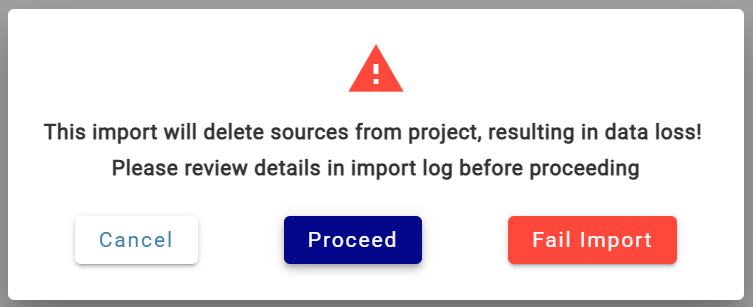
- Cancel: cancels out of the modal and keeps the import on pause
- Proceed: resumes the import that will result in sources being deleted
- Fail Import: fails the import without committing any changes to the project
To see which sources will be deleted, click Cancel and open the logs via the Log icon.
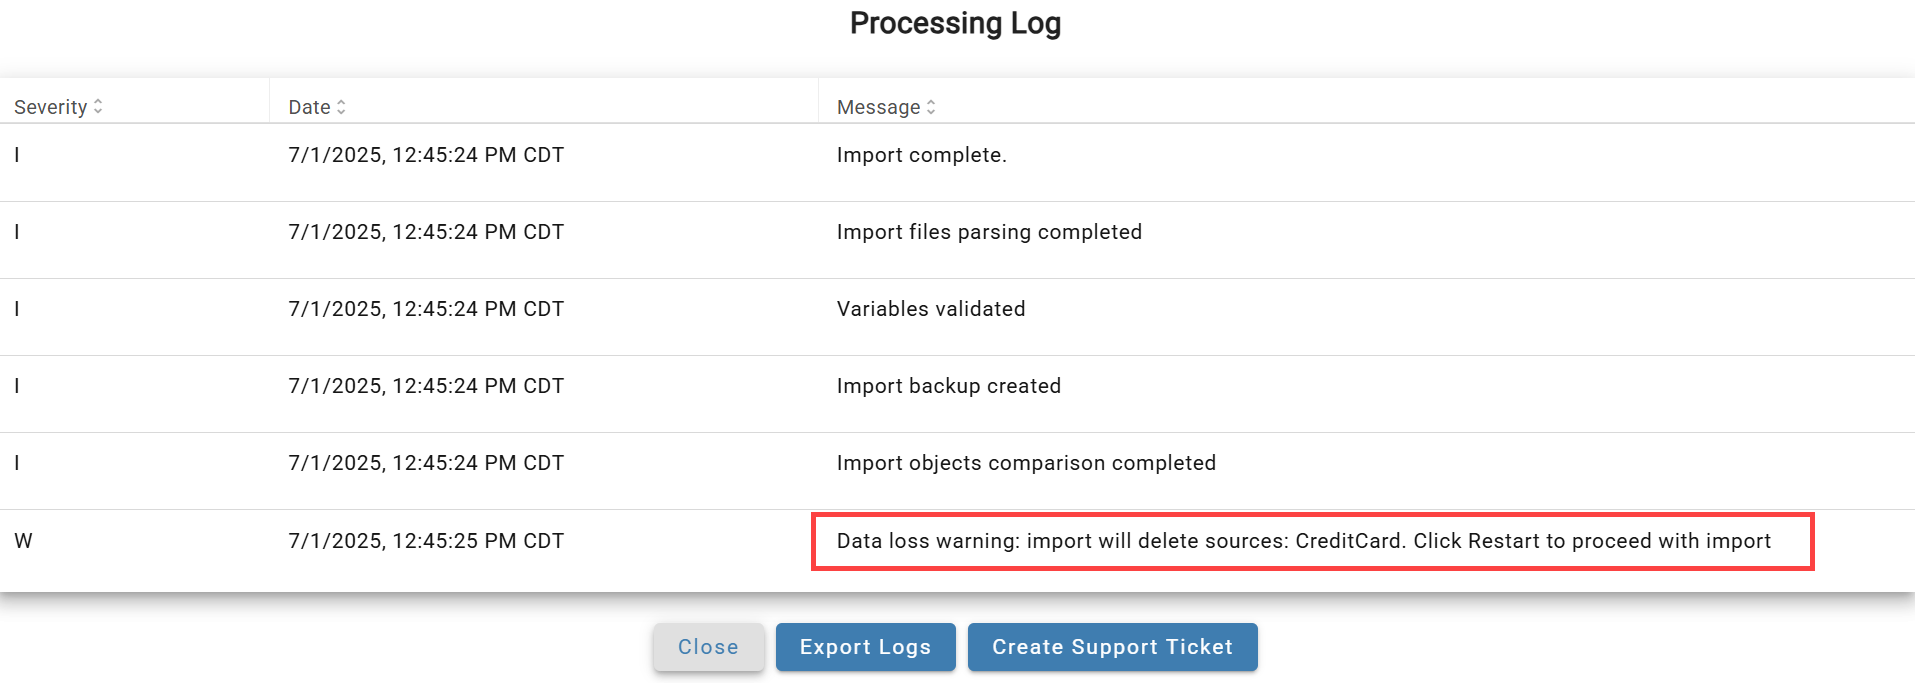
After reviewing, click the status icon to choose how to proceed.
Debugging Project Updates
Objects created or modified by an import show "Created/Updated by import \<import number>" with a timestamp matching the import start time. Cross-reference against Menu → Projects → Imports tab to identify which import made the change.

Making Changes or Fixes on a Project
Define a migration strategy before starting development. For GitHub-based change management, see Managing Project Changes with GitHub. At its simplest:
- Export the latest version of the project that needs configuration changes
- Import the project export folder from step 1 into a new or existing project where the changes can be made and tested
- Export the project contents from the development/test project from step 2 into a compressed zip folder
- Import the project export folder from step 3 back into the original project from step 1 that needs updating
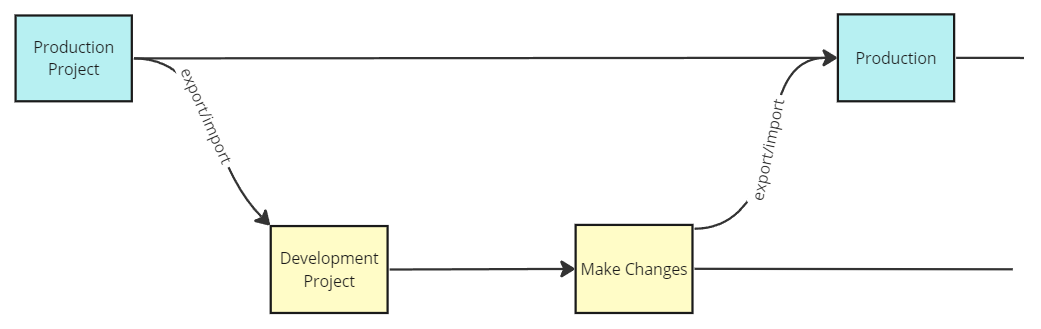
Simplified visual of change process
Merging Changes from Multiple Projects
For GitHub-integrated workflows, use branch and merge strategies. Without GitHub, manually recreate changes from one project into another, or carefully replace targeted YAML files in an export folder before re-importing.
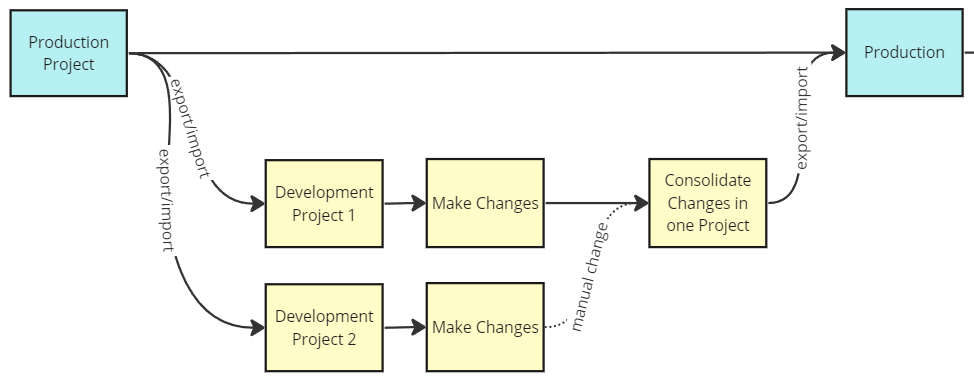
Visual of manual changes needed from multiple projects with Github
Deleting a Project
Open the project and select Delete. A series of confirmation steps follows — all objects, metadata, and data in the project are permanently deleted. A final confirmation box shows object counts and requires typing the project name exactly before clicking Yes.
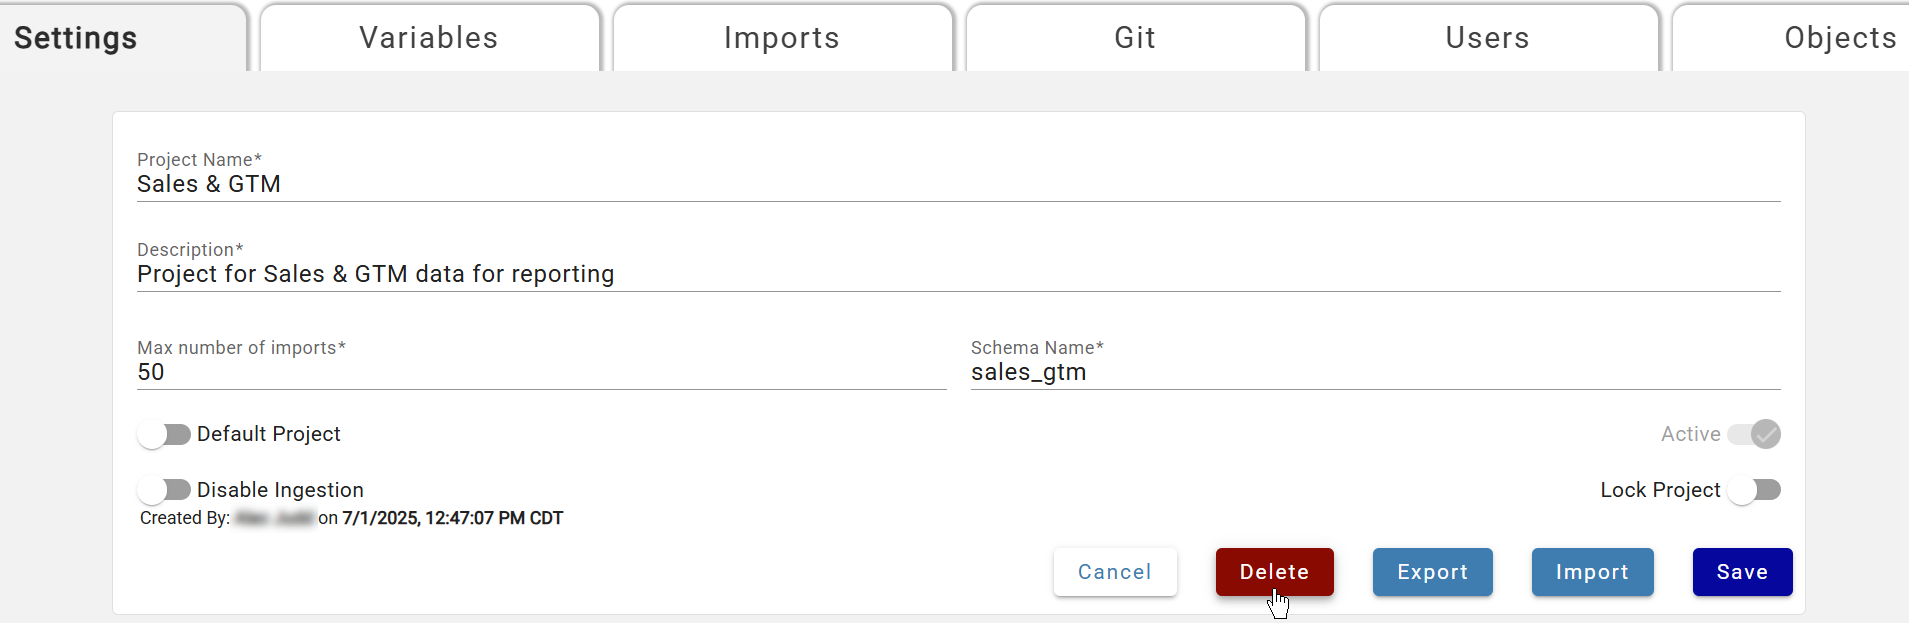
Initial Delete Selection
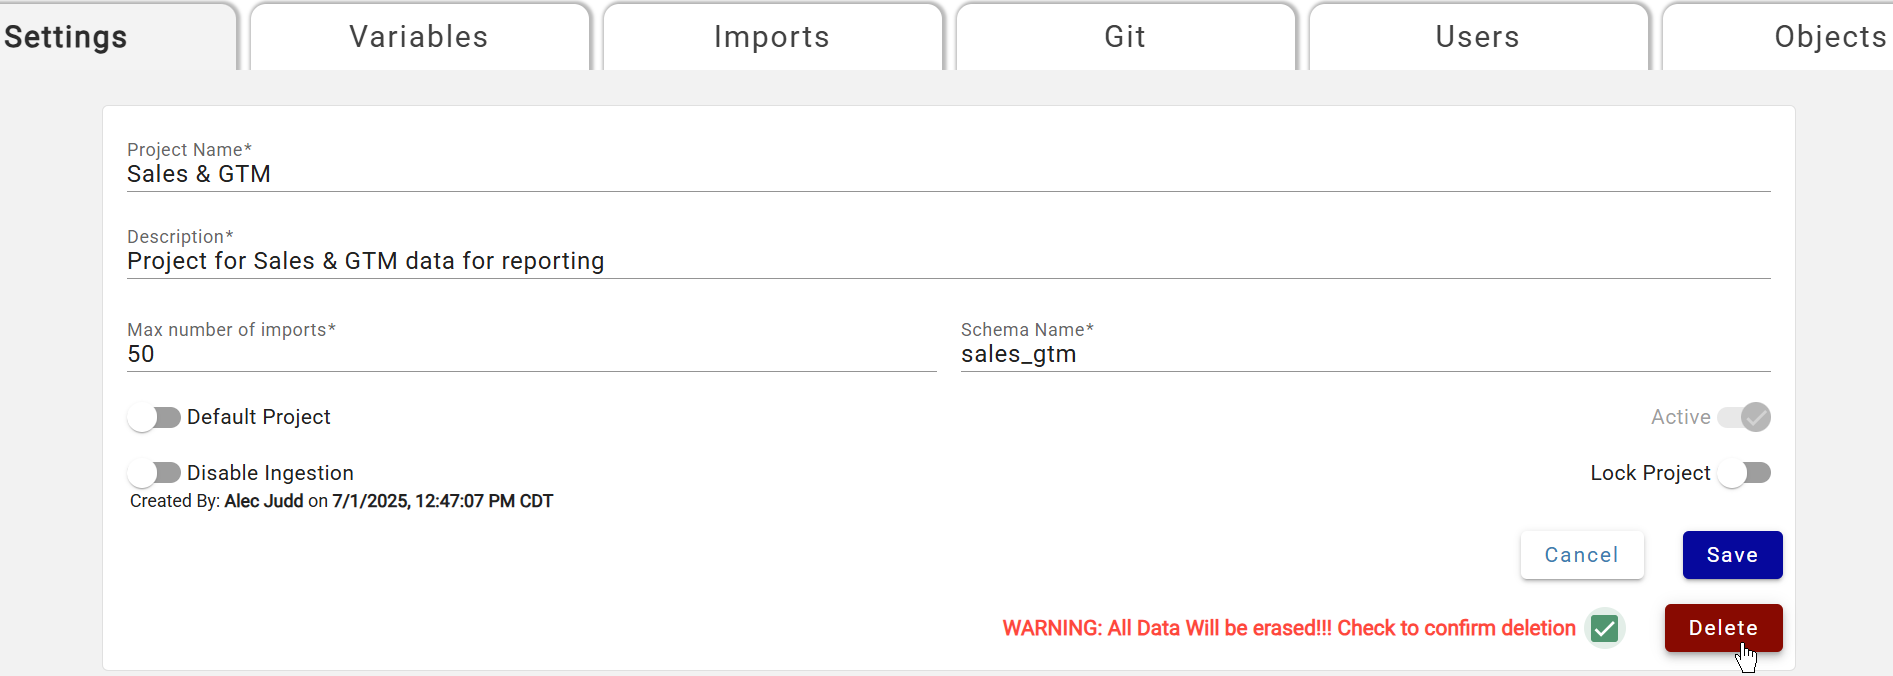
First Warning and Second Delete Selection
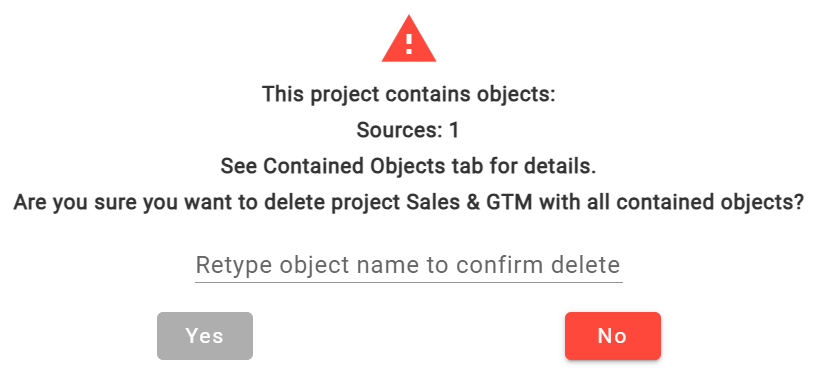
Second Warning and Confirmation Box
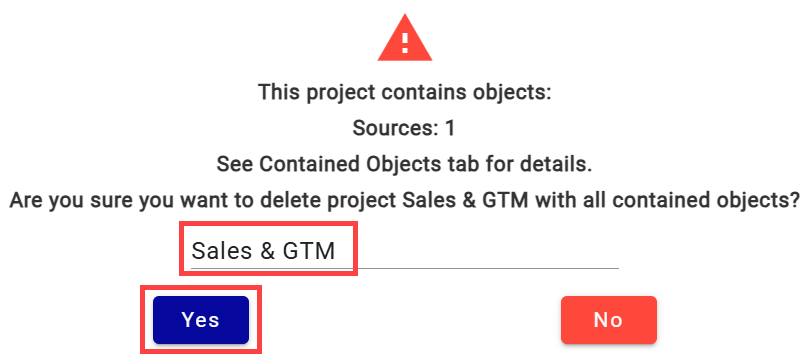
Typing Project name to Confirm and Select Yes
Best Practices for Migrating Changes in Projects (export/import)
Plan ahead for version upgrades — Export/import only works between workspaces on the same major version. Plan upgrades accordingly.
Communicate with other developers — Coordinate before running export/import to avoid migrating unfinished changes.
Back up the target project first — Export the target project before importing. Use GitHub for branch-based backups; see Managing Projects with GitHub.
Pre-create workspace-wide objects in the target (cross-workspace imports only) — Connections, compute/process configurations, and schedules must exist in the target before importing, or the import will error.
Use GitHub to validate configuration changes — Compare YAML files between exports to review what changed. See Managing Projects with GitHub.
Keep a copy of the imported zip folder — Retain the zip for troubleshooting if unexpected behavior occurs after import.
Migrate data platform objects manually (cross-workspace imports only) — Custom notebooks are not migrated by DataForge; copy or recreate them in the target workspace.
Check the Imports tab — After importing, check the Imports tab for status. Click the Logs icon on failed imports to view the error.
Validate the target project — Scan updated sources and outputs to confirm changes landed correctly.
Contact DataForge Support if needed — Import log errors point to the blocking configuration. If stuck, submit a support request.