Sign Up for DataForge
If you're new to DataForge, this is the right place to start. This article walks you through the steps required to create your DataForge account and get your first workspace up and running.
Step 1: Sign up for a free trial
Visit the DataForge website and select the Start a Free Trial option in the top right to start the process of creating your account.
Step 2: Set your password through the Reset Password email
You will receive an email to reset your password. Follow the "Reset my password" prompt to set the password for your new account.
Afterward, select the option to return Back to DataForge Accounts and login.
Step 3: Choose your Cloud Provider
Choose your Cloud Provider. The Cloud Provider file storage and infrastructure resources will be utilized by Databricks, a key component of DataForge.
Step 4: Enter Payment Information for use after the free trial
Select the desired payment method and fill in the remaining fields. You will not be billed until after your free trial has ended. Your payment information can be updated after initial sign-up and you may cancel the subscription anytime.
Step 5: Create a Databricks Personal Access Token
DataForge workspaces are set up using a Databricks workspace personal access token. Follow the Databricks instructions here to create a new access token for a user or service principal: https://docs.databricks.com/en/dev-tools/auth/pat.html
Be sure to copy the token value and save it as it will not be accessible after creation.
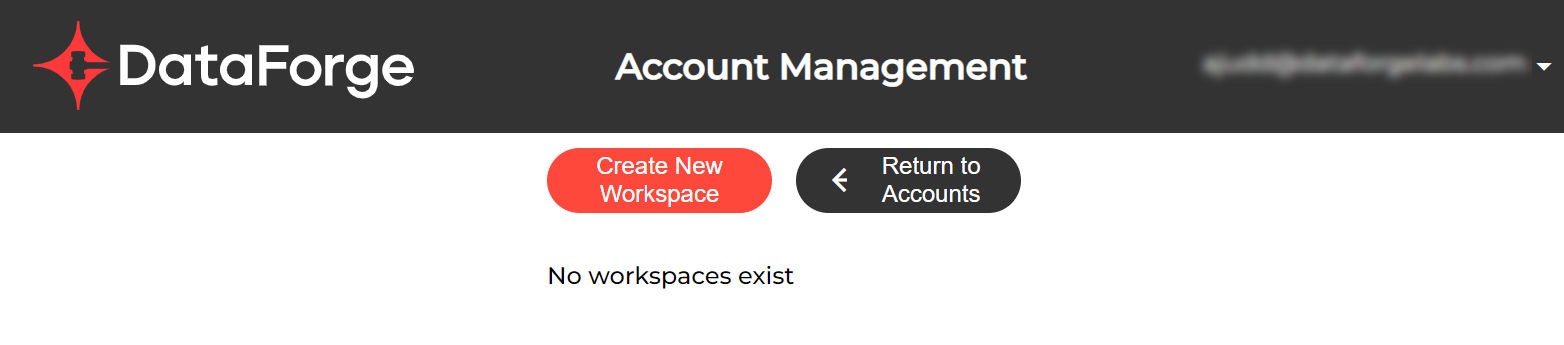
Step 6: Create New Workspace
While logged in to the DataForge account, select the Create New Workspace option.
Fill in the following information:
- Workspace Name: Enter the name you would like the DataForge workspace to have. Typically, this can be named the same as the Databricks workspace unless a custom name makes sense.
- Databricks Workspace URL: Enter the URL of your existing Databricks workspace (e.g. https://
.cloud.databricks.com). - Databricks Access Token: Paste the Personal Access Token value from Step 5.
Select the option to Validate. If the validation is unsuccessful, check the secret/token value is entered correctly along with the correct Databricks workspace URL. If additional help is needed, open a support request with the DataForge support team.
After the validation is successful, enter the remaining prompts with the correct information from your cloud provider or Databricks.
Select Submit after filling in all of the information is entered. If the submission process is successful, you will be redirected back to the Workspaces page and see the new Workspace pending.
Next Steps
You will receive an email once the new Workspace is created and available to you. The first time you login to the Workspace you will need to reset your password.
In the meantime, explore the Getting Started and User Manual to begin familiarizing yourself with how DataForge works and how to begin setting up data pipelines.
Once your workspace is available, visit the Data Integration Example to follow along through a simple tutorial on setting up new sources and outputs.
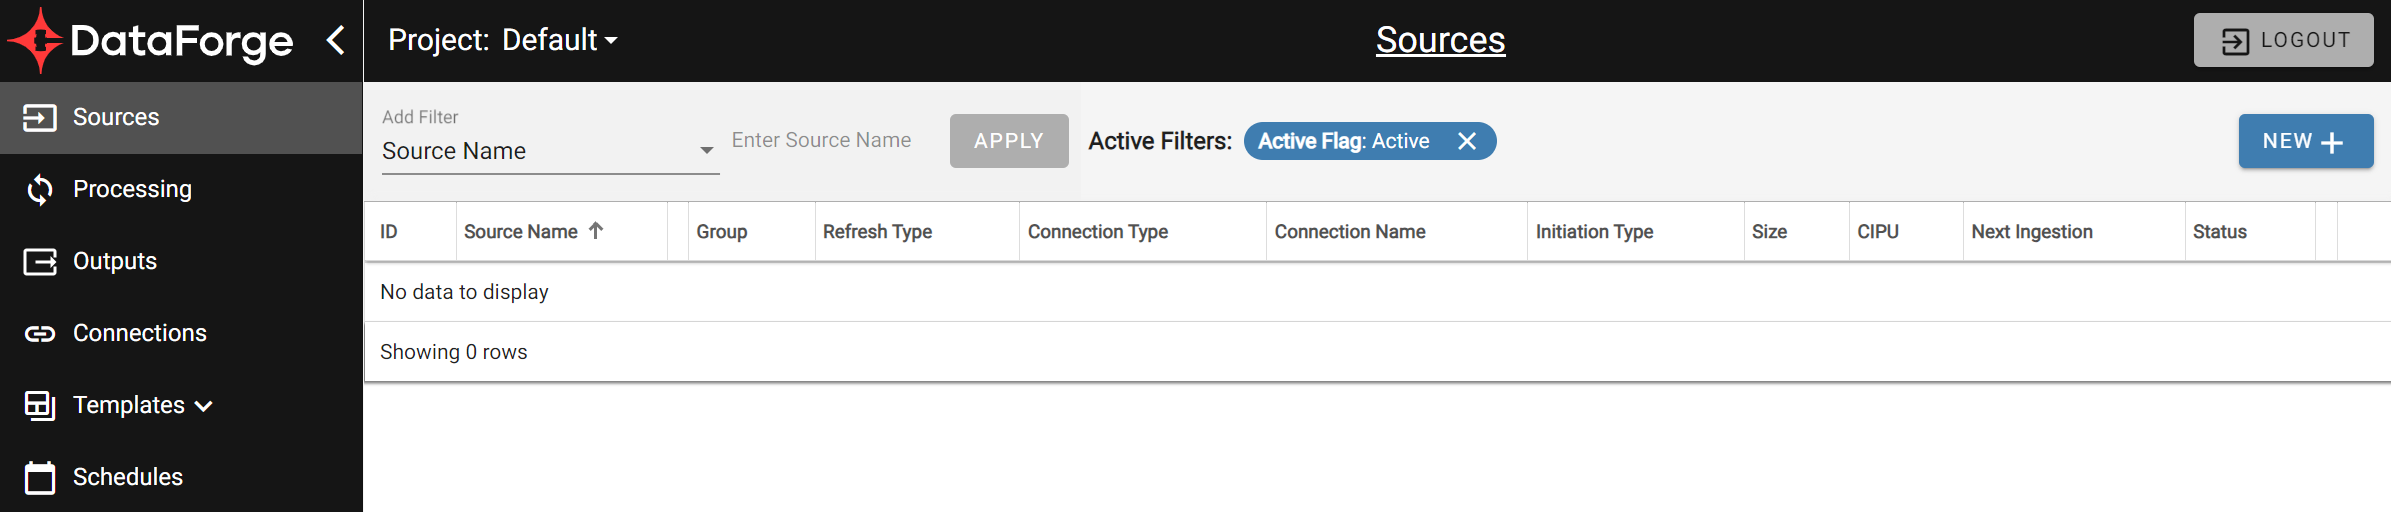
After you've logged in to the Workspace, you'll know you're in the right spot when you see this page.
Get Help
If you have any questions about setting up DataForge and need help, please open a support request with our support team.
To open a support request, first create a Help Center account and then submit a request.